Companies and organizations need an internal chat platform to build their own messaging service. Mattermost is an open-source messaging system that is self-hosted for teams and developers to communicate in a single place. This high trust online chat service is written in the Golang and React programming languages. In this article, you will learn How to Install Mattermost messaging on Ubuntu 20.04. Due to your needs, you can buy a Linux VPS or prepare your own Ubuntu VPS and continue reading.
Table of Contents
Tutorial Install Mattermost messaging on Ubuntu 20.04
To let this tutorial work better, please consider the below Prerequisites:
A non-root user with sudo privileges.
To set up, follow our Initial server setup on Ubuntu 20.04.
In this guide, we will use the PostgresSQL database or MySQL. You will install Mattermost with Nginx and Let’s Encrypt SSL on Ubuntu 20.04. Stay with us to review the required steps.
Install Mattermost messaging on Ubuntu 20.04 | Ubuntu 18.04
According to news, Mattermost is an alternative to the Slack chat platform. Mattermost is a good idea to start a collaboration from anywhere or from your desktop, Android device, and iPhone. There are many of the world’s enterprises that are increasing their collaboration since Mattermost lets them connect people, tools, and automation. Let’s go through the steps of this guide to become an expert in Mattermost installation.
First, as we always recommend, get started with updating your system packages. So, run the command below:
apt-get update -yNow, install other required dependencies using the following commands:
apt-get install curl wget vim git unzip gnupg2 -yHow to install and configure MariaDB
As we mentioned, Mattermost uses MySQL/MariaDB as a database backend. If you have not installed the MariaDB server yet, use the command below to do this.
apt-get install mariadb-server -yYou can log in to the MariaDB by running the following command when the installation is finished.
mysqlTo create a database and user for Mttermost, type:
MariaDB [(none)]> CREATE DATABASE mattermostdb; MariaDB [(none)]> CREATE USER 'mattermost'@'%' IDENTIFIED BY 'password';Then, you can grant all the privileges to the Mattermost by running the command below:
MariaDB [(none)]> GRANT ALL PRIVILEGES ON mattermostdb.* TO 'mattermost'@'%';And also flush the privileges and exit from the MariaDB shell.
MariaDB [(none)]> FLUSH PRIVILEGES; MariaDB [(none)]> EXIT;How to install and configure Mattermost
You are recommended to download the latest version of Mattermost from its official website. Also, you can use the command below to download it.
wget https://releases.mattermost.com/5.24.2/mattermost-5.24.2-linux-amd64.tar.gzWhen you finished the download, use the command below to extract the downloaded file:
tar -xvzf mattermost-5.24.2-linux-amd64.tar.gzThen, copy the extracted directory to the /opt:
cp -r mattermost /optAnd to create a data directory for Mettermost, run:
mkdir /opt/mattermost/dataUse the following command to create a separate user to run Mattermost.
useradd --system --user-group mattermostIt is time to change the ownership of the mattermost directory to mattermost and give proper permissions by running the command below:
chown -R mattermost:mattermost /opt/mattermost chmod -R g+w /opt/mattermostThe mattermost default configuration file should be edited and then define your database settings and site URL. Use the following command to do this:
nano /opt/mattermost/config/config.jsonThen, you can change the following lines due to your priorities:
"SiteURL": "https://mattermost.domain.com","DriverName": "mysql", "DataSource": "mattermost:password@tcp(localhost:3306)/mattermostdb?charset=utf8mb4,utf8\u0026readTimeout=30s\u0026writeTimeout=30s",You can save and close the file when you are finished.
How to create a Systemd service file for Mattermost
At this point, you need to create a system service file to manage the Mattermost service. To create it, type:
nano /lib/systemd/system/mattermost.serviceAnd add the following lines:
[Unit] Description=Mattermost After=network.target After=mysql.service Requires=mysql.service[Service] Type=notify User=mattermost Group=mattermost ExecStart=/opt/mattermost/bin/mattermost TimeoutStartSec=3600 Restart=always RestartSec=10 WorkingDirectory=/opt/mattermost LimitNOFILE=49152[Install] WantedBy=mariadb.serviceThen, you can save and close the file. Reload the system daemon by running:
systemctl daemon-reloadNow you can start Mattermost service and enable it to start at system reboot with the command below:
systemctl start mattermost systemctl enable mattermostTo verify the status of the Mattermost service, use the following command;
systemctl status mattermostThe correct output should be like the below:
? mattermost.service - Mattermost Loaded: loaded (/lib/systemd/system/mattermost.service; disabled; vendor preset: enabled) Active: active (running) since Sat 2020-08-01 09:12:52 UTC; 17s ago Main PID: 4106 (mattermost) Tasks: 20 (limit: 2353) Memory: 85.9M CGroup: /system.slice/mattermost.service ??4106 /opt/mattermost/bin/mattermost ??4198 plugins/com.mattermost.nps/server/dist/plugin-linux-amd64Aug 01 09:12:52 ubuntu2004 mattermost[4106]: {"level":"info","ts":1596273172.131499,"caller":"mlog/sugar.go:19","msg":"Sent notification of ne> Aug 01 09:12:52 ubuntu2004 mattermost[4106]: {"level":"info","ts":1596273172.1841655,"caller":"jobs/workers.go:73","msg":"Starting workers"} Aug 01 09:12:52 ubuntu2004 mattermost[4106]: {"level":"info","ts":1596273172.1842792,"caller":"bleveengine/bleve.go:267","msg":"UpdateConf Ble> Aug 01 09:12:52 ubuntu2004 mattermost[4106]: {"level":"info","ts":1596273172.1930475,"caller":"jobs/schedulers.go:74","msg":"Starting schedule> Aug 01 09:12:52 ubuntu2004 mattermost[4106]: {"level":"info","ts":1596273172.20063,"caller":"app/web_hub.go:83","msg":"Starting websocket hubs> Aug 01 09:12:52 ubuntu2004 mattermost[4106]: {"level":"info","ts":1596273172.2099638,"caller":"app/license.go:37","msg":"License key from http> Aug 01 09:12:52 ubuntu2004 mattermost[4106]: {"level":"info","ts":1596273172.2205582,"caller":"app/server.go:525","msg":"Starting Server..."} Aug 01 09:12:52 ubuntu2004 mattermost[4106]: {"level":"info","ts":1596273172.2208374,"caller":"app/server.go:594","msg":"Server is listening o> Aug 01 09:12:52 ubuntu2004 mattermost[4106]: {"level":"info","ts":1596273172.2211802,"caller":"commands/server.go:106","msg":"Sending systemd > Aug 01 09:12:52 ubuntu2004 systemd[1]: Started Mattermost.In this way, Mattermost is running and listening on port 8065.
How to configure Nginx
In this step, you should configure Nginx as a reverse proxy for Mattermost. To install the Nginx package, type:
apt-get install nginx -yWhen the installation is complete, run the command below to create an Nginx virtual host configuration file.
nano /etc/nginx/sites-available/mattermost.confAnd again, add the following lines:
upstream mattermost { server localhost:8065; keepalive 32; }proxy_cache_path /var/cache/nginx levels=1:2 keys_zone=mattermost_cache:10m max_size=3g inactive=120m use_temp_path=off;server { listen 80; server_name mattermost.domain.com;location ~ /api/v[0-9]+/(users/)?websocket$ { proxy_set_header Upgrade $http_upgrade; proxy_set_header Connection "upgrade"; client_max_body_size 50M; proxy_set_header Host $http_host; proxy_set_header X-Real-IP $remote_addr; proxy_set_header X-Forwarded-For $proxy_add_x_forwarded_for; proxy_set_header X-Forwarded-Proto $scheme; proxy_set_header X-Frame-Options SAMEORIGIN; proxy_buffers 256 16k; proxy_buffer_size 16k; client_body_timeout 60; send_timeout 300; lingering_timeout 5; proxy_connect_timeout 90; proxy_send_timeout 300; proxy_read_timeout 90s; proxy_pass http://mattermost; }location / { client_max_body_size 50M; proxy_set_header Connection ""; proxy_set_header Host $http_host; proxy_set_header X-Real-IP $remote_addr; proxy_set_header X-Forwarded-For $proxy_add_x_forwarded_for; proxy_set_header X-Forwarded-Proto $scheme; proxy_set_header X-Frame-Options SAMEORIGIN; proxy_buffers 256 16k; proxy_buffer_size 16k; proxy_read_timeout 600s; proxy_cache mattermost_cache; proxy_cache_revalidate on; proxy_cache_min_uses 2; proxy_cache_use_stale timeout; proxy_cache_lock on; proxy_http_version 1.1; proxy_pass http://mattermost; } }When you are finished, you can save and close the file. To activate the virtual host configuration, run:
ln -s /etc/nginx/sites-available/mattermost.conf /etc/nginx/sites-enabled/mattermost.confTo verify the Nginx for any configuration error, type
nginx -tThe below output should be displayed:
nginx: the configuration file /etc/nginx/nginx.conf syntax is ok nginx: configuration file /etc/nginx/nginx.conf test is successfulTo apply the changes, restart the Nginx with the following command:
systemctl restart nginxHow to secure Mattermost with Let’s Encrypt SSL
To manage the Let’s Encrypt SSL, you need to install Certbot client in your system. Use the following command to do this:
apt-get install python3-certbot-nginx -yOnce you installed Certbot, run the command below to install the Let’s Encrypt SSL for your website.
certbot --nginx -d mattermost.domain.comAs shown below, you will be asked to provide a valid email address and accept the term of service.
Saving debug log to /var/log/letsencrypt/letsencrypt.log Plugins selected: Authenticator nginx, Installer nginx Enter email address (used for urgent renewal and security notices) (Enter 'c' to cancel): [email protected]- - - - - - - - - - - - - - - - - - - - - - - - - - - - - - - - - - - - - - - - Please read the Terms of Service at https://letsencrypt.org/documents/LE-SA-v1.2-November-15-2017.pdf. You must agree in order to register with the ACME server at https://acme-v02.api.letsencrypt.org/directory - - - - - - - - - - - - - - - - - - - - - - - - - - - - - - - - - - - - - - - - (A)gree/(C)ancel: A- - - - - - - - - - - - - - - - - - - - - - - - - - - - - - - - - - - - - - - - Would you be willing to share your email address with the Electronic Frontier Foundation, a founding partner of the Let's Encrypt project and the non-profit organization that develops Certbot? We'd like to send you email about our work encrypting the web, EFF news, campaigns, and ways to support digital freedom. - - - - - - - - - - - - - - - - - - - - - - - - - - - - - - - - - - - - - - - - (Y)es/(N)o: Y Obtaining a new certificate Performing the following challenges: http-01 challenge for mattermost.domain.com Waiting for verification... Cleaning up challenges Deploying Certificate to VirtualHost /etc/nginx/sites-enabled/mattermost.confThen, you need to select whether or not to redirect HTTP traffic to HTTPS:
- - - - - - - - - - - - - - - - - - - - - - - - - - - - - - - - - - - - - - - - 1: No redirect - Make no further changes to the webserver configuration. 2: Redirect - Make all requests redirect to secure HTTPS access. Choose this for new sites, or if you're confident your site works on HTTPS. You can undo this change by editing your web server's configuration. - - - - - - - - - - - - - - - - - - - - - - - - - - - - - - - - - - - - - - - - Select the appropriate number [1-2] then [enter] (press 'c' to cancel): 2Now, type 2 and press Enter to install the Let’s Encrypt SSL on your domain. then, you will see an output as below:
Redirecting all traffic on port 80 to ssl in /etc/nginx/sites-enabled/mattermost.conf- - - - - - - - - - - - - - - - - - - - - - - - - - - - - - - - - - - - - - - - Congratulations! You have successfully enabled https://mattermost.domain.comYou should test your configuration at: https://www.ssllabs.com/ssltest/analyze.html?d=mattermost.domain.com - - - - - - - - - - - - - - - - - - - - - - - - - - - - - - - - - - - - - - - -IMPORTANT NOTES: - Congratulations! Your certificate and chain have been saved at: /etc/letsencrypt/live/mattermost.domain.com/fullchain.pem Your key file has been saved at: /etc/letsencrypt/live/mattermost.domain.com/privkey.pem Your cert will expire on 2020-10-30. To obtain a new or tweaked version of this certificate in the future, simply run certbot again with the "certonly" option. To non-interactively renew *all* of your certificates, run "certbot renew" - Your account credentials have been saved in your Certbot configuration directory at /etc/letsencrypt. You should make a secure backup of this folder now. This configuration directory will also contain certificates and private keys obtained by Certbot so making regular backups of this folder is ideal. - If you like Certbot, please consider supporting our work by:Donating to ISRG / Let's Encrypt: https://letsencrypt.org/donate Donating to EFF: https://eff.org/donate-le- We were unable to subscribe you the EFF mailing list because your e-mail address appears to be invalid. You can try again later by visiting https://act.eff.org.How to access Mattermost web interface
Open a web browser and type the URL https://mattermost.domain.com to be redirected to the Mattermost sign up screen:
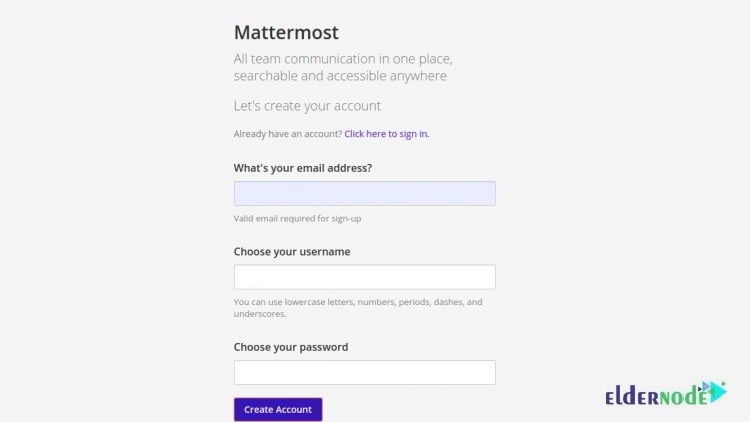
Then, enter your email address, name, password, and click on the ”Create Account” button. The following screen will display.
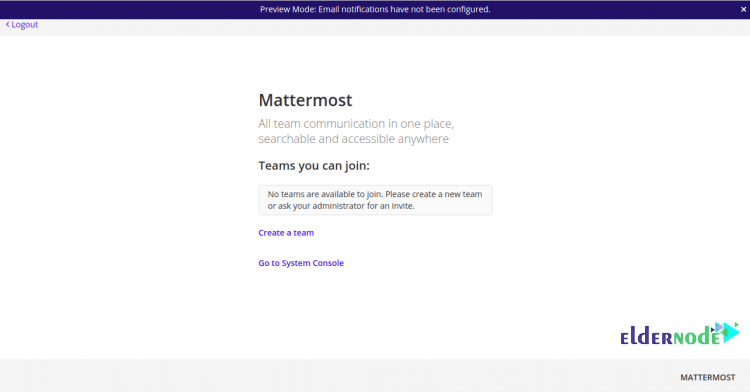
Now, click on the ”Create a team” button. Then, you will see the screen below:
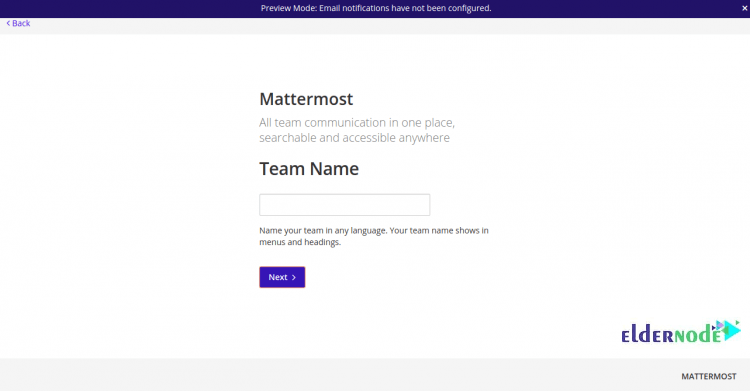
Choose a name for your Team and click on the ”Next” button. The screen below is what you should see then:
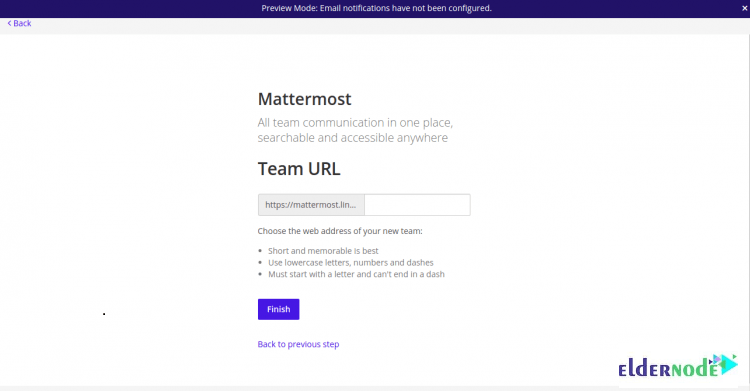
Now, it is time to provide your team UPL and click on the ”Finish” button. A screen as mattermost Welcome screen will be displayed:

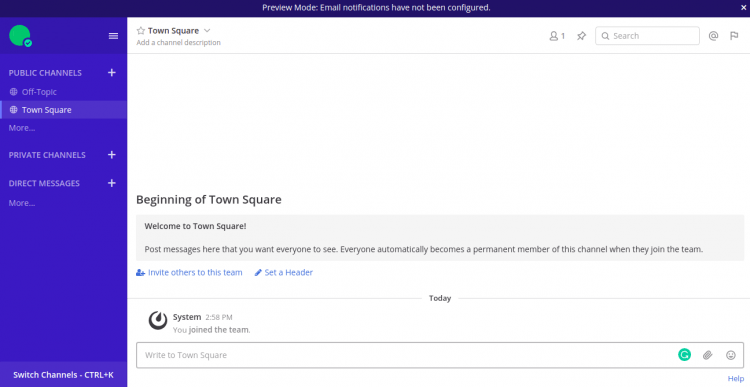
Finally, click on the ”Skip Tutorials” button to view the following screen as the Mattermost dashboard:
Conclusion
In this article, you learned How To Install Mattermost messaging On Ubuntu 20.04. Install Mattermost to ensure security and privacy for full control of data. It could work seamlessly with enterprise security, identity, and compliance systems.