How to Password Protect Sites in Plesk. In the previous article, we taught you how to password protect folders in IIS. In this segment, we will review how to protect folders and domains on a Windows server using Plesk.
Plesk’s protection features will add an extra layer of security to your sites and content. Plesk is easier to set up than just using the Windows IIS service manager.
Choose your perfect Windows Virtual Private Server Packages in Eldernode
Brief description of Plesk
Plesk is a hosting platform used for server administration. It will allow you to manage your websites, DNS zones, plugins, databases, email accounts, reseller accounts, etc. via a web-based interface.
Password Protection Settings
1. Open Plesk.
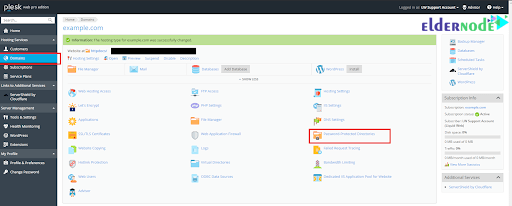
2. Navigate to Domains > Domain name that you want to edit > Password-Protected Directories.
3. Click Add Protected Directory.
4. Type a path to the directory that you want to restrict, and a title that will be visible to the visitors.
5. Click OK.

Add User to Password Protected List
You have to allow a user or users access to the password-protected directory. To accomplish this, use the following directions:
1. Navigate to your Domains > Domain name that you want to edit > Password-Protected Directories.
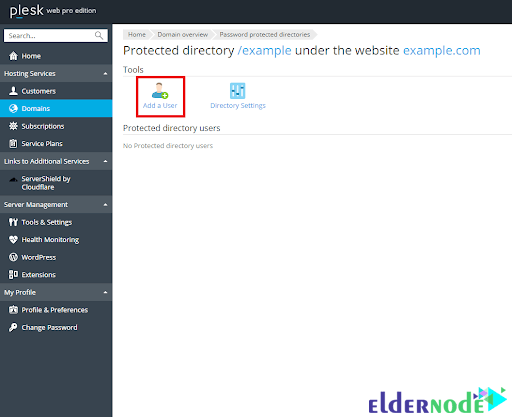
2. Click on the directory that you want to add user to.
3. Set the username and password.
4. Click OK.

Good Job! Securing access to your domains and folders can be done easily.
Dear user, we hope you would enjoy this tutorial, you can ask questions about this training in the comments section, or to solve other problems in the field of Eldernode training, refer to the Ask page section and raise your problem in it as soon as possible. Make time for other users and experts to answer your questions.
How to Password Protect Sites in Plesk.
Goodluck.


