MemberPress is the name of a WordPress application plugin that allows you to create a powerful user interface on your website as well as manage your users’ membership and login. This plugin also allows you to manage access to various pages, categories, tags, and files and restrict access to them for your users. In this article, we try to teach you about Tutorial Manage Clients on WordPress with MemberPress. You can visit the packages available in Eldernode if you want to buy a VPS server.
Table of Contents
How to Manage Clients on WordPress with MemberPress
One of the best user file management plugins in WordPress is MemberPress. Among the functions of this plugin, we can mention subscribing and locking some content on the site. But these are not the only features of MemberPress. By installing this plugin, you can download advanced and tag the desired files. It will even be possible to categorize files.
Locking files through MemberPress allows only users who have the right conditions to access the files. With the help of this feature, you can protect your files based on the tag or category, and prevent them from being displayed to the general public. If you publish a lot of posts or blogs every day, it will be a little difficult for these people to use and search for these files. Because their favorite post will disappear amidst the mass of content. To avoid this problem, you can organize them by tagging so that users can access the relevant posts through their favorite tag. The plugin also supports some email marketing services such as ConvertKit, Constant Contact, and AWeber.
Introducing to MemberPress on WordPress
MemberPress plugin allows you to create different memberships on your website and set a price for each. After creating various memberships on the website, you can specify the level of access of the users to the contents and sections of the website according to the membership fee.
This plugin allows you to use the notification section of this plugin to notify your users of their account expiration and ask them to pay their membership fee.
In the next section, we will introduce some of the features of this plugin. Please join us.
MemberPress Features
MemberPress plugin has a powerful reporting system that allows you to be notified of events and memberships on your website and identify areas that need improvement. Here are some of the features of this plugin:
1. Ability to manage and install easily without the need for programming knowledge
2. Ability to manage users’ access to different sections of the website
3. Creating discount coupons on the website
4. Has a reminder system (account expiration or any other case)
5. It has a very secure system
6. Compatible with all WordPress themes
7. Has different settings for system configuration
8. Unlimited creation
9. Possibility to choose the price for each membership period
10. Has an expiration system for access to content
11. Has a powerful reporting system
In the next section, we will teach you to step by step how to Manage Clients on WordPress with MemberPress.
How to Install MemberPress Plugin on WordPress
Now that you are fully acquainted with MemberPress, we now come to how to install this plugin. After purchasing the MemberPress plugin, you can log in to MemberPress and download the zip file for the plugin. Note that we will follow these instructions to install the plugin manually using FTP. So follow these steps in order:
The first step is to extract the memberpress.zip file that you have already downloaded.
Then you need to connect to your web server using your favorite FTP Client like FileZilla.
Now you need to copy the extracted /Memberpress/ directory from your computer to the /wp-content/plugins/ folder on the remote server.
After you have successfully transferred the file, you can now log in to your WordPress dashboard.
Finally, go to the plugins page and click “Activate” under the MemberPress plugin.
Note: If you have done all the above steps correctly, you should now have a new menu item in the dashboard called “MemberPress“.
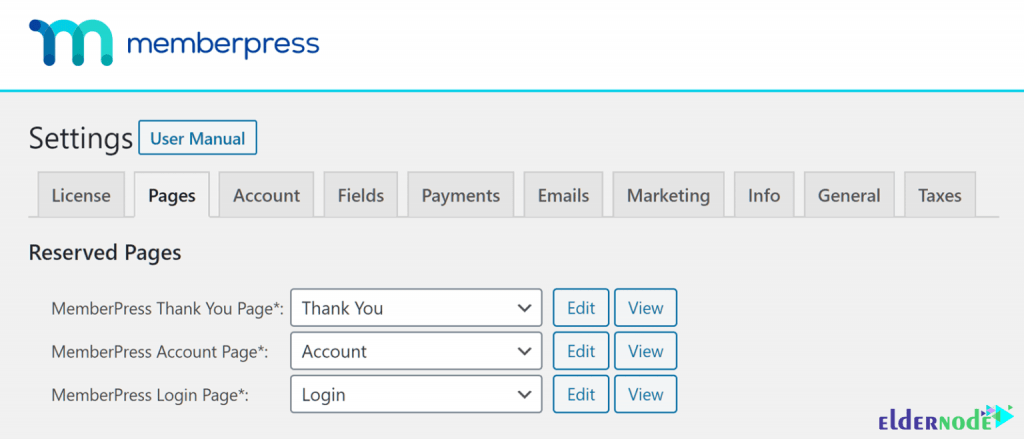
It should be noted that after activation, you must go to the MemberPress » Settings page to enter the license key. In the next step, you need to go to the “Payments” tab and select a payment method to accept membership subscription payments. It should also be noted that you can create free subscriptions if you wish, or add your members manually.
How to Enable New User Registrations in MemberPress
It does not take long for a new user to register on your WordPress membership site. In this section, we intend to perform the basic steps to create the foundation of a new membership site. This means generating some important content, such as thank you pages, accounts, and logins.
The next step is to create a membership and allow visitors to register as users on the membership site. The point is, after creating at least one membership, your visitors will have a way to register through the online form and membership.
*
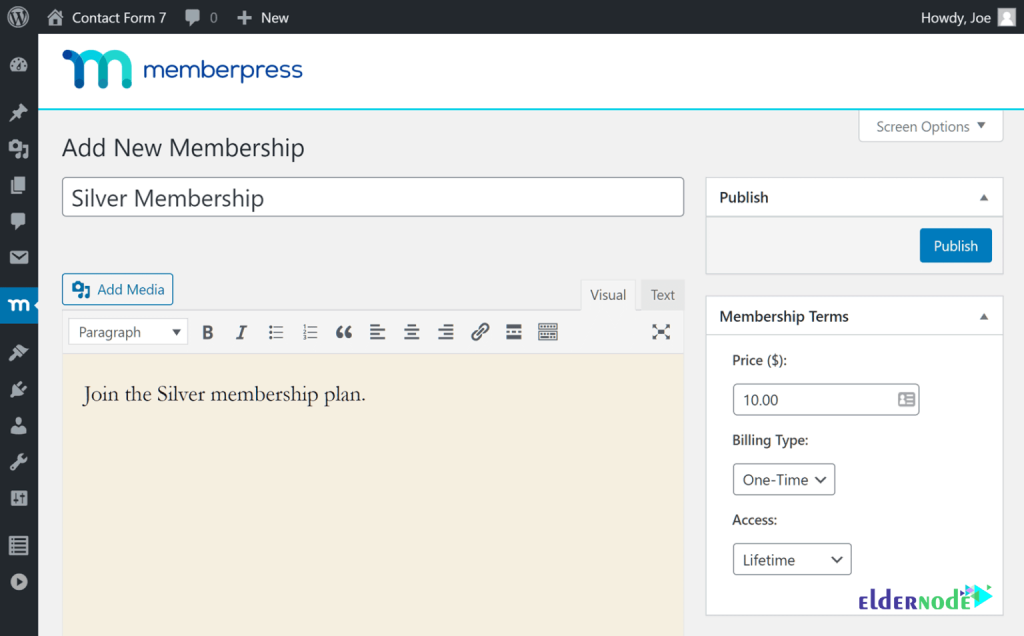
You are now ready to create a membership plan. By doing this you will be able to add your clients to it.
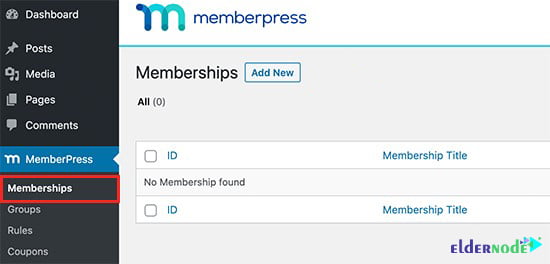
Go to the MemberPress >> Memberships page as shown and click the Add New button.
In the next step, you can give your membership plan a name. You can also specify a pricing option. It is interesting to know that depending on how the client contracts are managed, you can choose lifetime plans, expiration, or fixed expiring.
The important part is that you have to create access rules. By doing this you can control the parts of your website that you want to be protected and only available to members.
To do this, you can go to the MemberPress >> Rules page and click the Add New button above.

Next, you need to select the content you want to restrict to “protected content“. You can select posts that match tags, categories, and single posts, or any URL. Next, you need to choose who will access the protected content. After you have added the access rules, click the Save Rule button to save your settings.
Manage Clients on WordPress with MemberPress
In this section, we are going to discuss how to Manage Clients on WordPress with MemberPress. If you have followed the steps correctly, you can now view and manage new members from within your WordPress dashboard. You can also see all the existing users who have registered on your site from the members’ page.
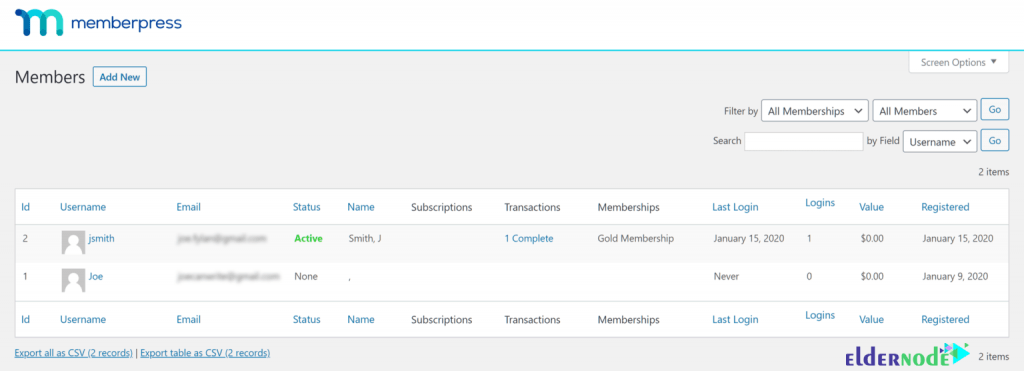
Through this page, you can get good information in identifying and managing new user registration. You can view each user’s registration date and sort members from newest to oldest. Also, if you want to edit the details of a client, you can click on the edit link below the member’s username. Therefore, you can view their user profile and edit their details if necessary.
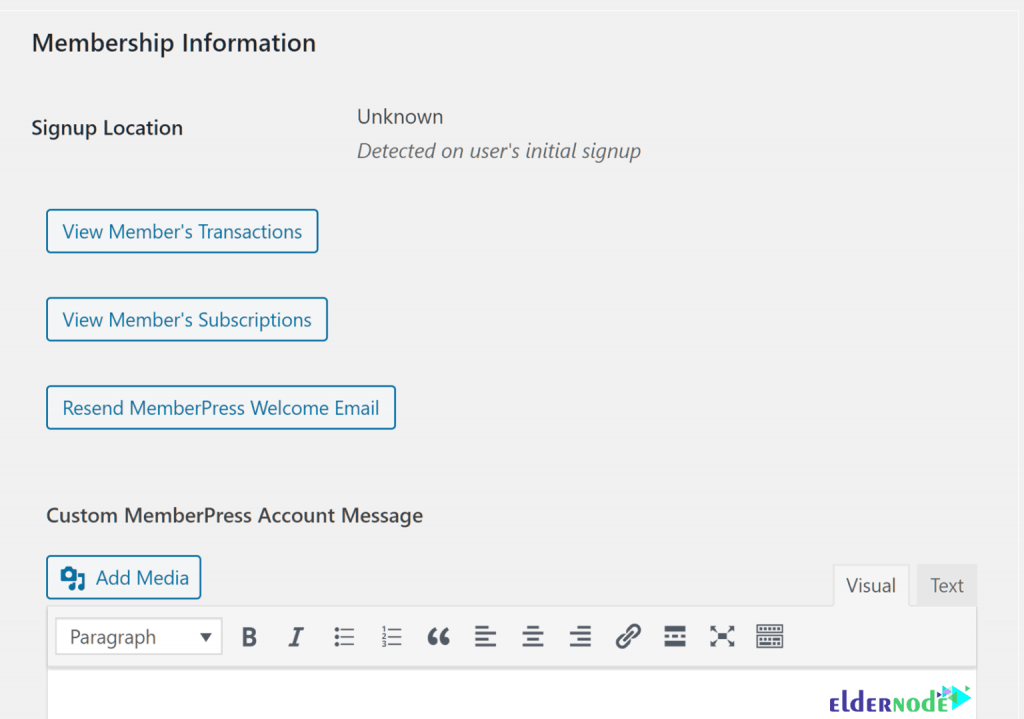
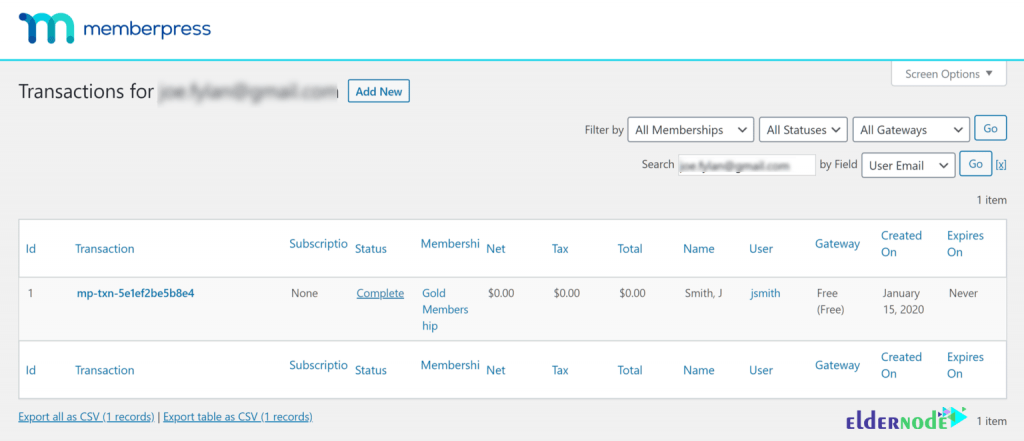
As you can see in the image below, the user membership information is displayed at the bottom of the default user details page. So you can find links to their subscription information for your membership site as well as transaction details.
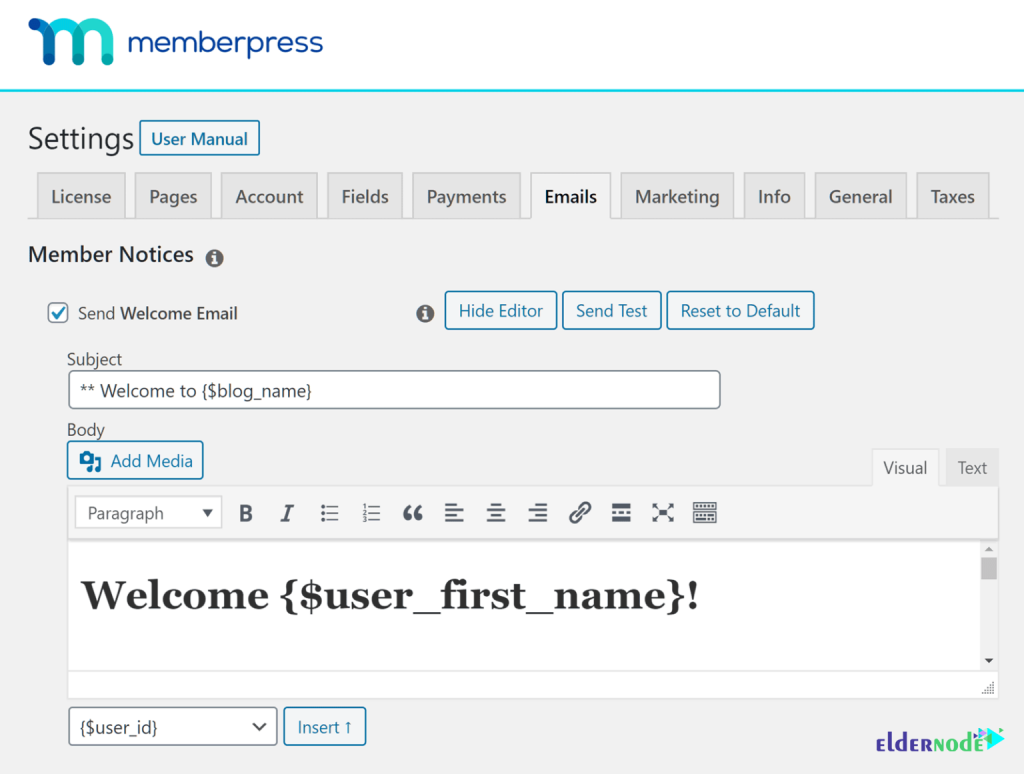
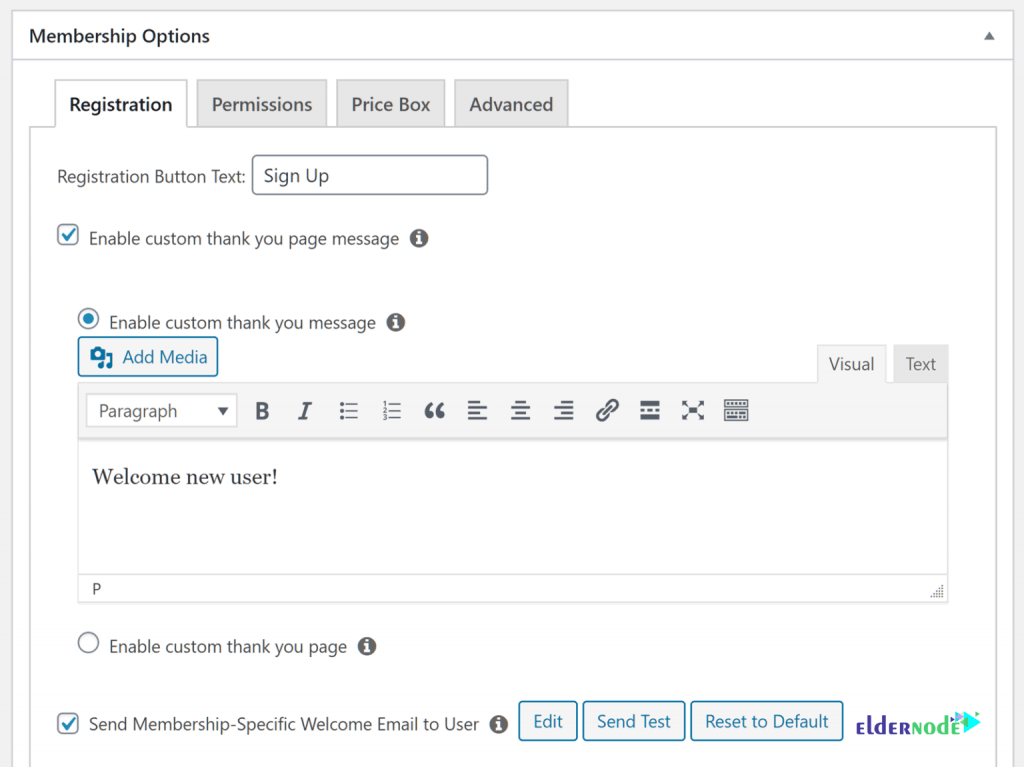
Note that working with the Memberpress plugin offers many benefits. The interesting thing is that in addition to managing new members from the manager’s point of view, you can also manage the user experience of joining your community. By default, MemberPress sends welcome emails to new members as soon as they sign up on your site. You can customize this to your liking. In fact, you can automatically set the emails you send to welcome new users with the user’s personal details such as name, membership plan, and payment status.
Another possibility is to create welcome content for your new users with the help of MemberPress. For example, you can enable a special thank you page that new users will be redirected to after the registration.
Conclusion
The MemberPress plugin is very powerful and allows you to easily expand your website. It also works well with other plugins. In this article, we tried to fully acquaint you with MemberPress and its features. We also taught you how to Manage Clients on WordPress with MemberPress.