To introduce one of the most popular web servers in the world, today we are going to present tutorial installation Nginx on CentOS 8. It is responsible for hosting some of the largest and most popular sites on the internet. In most cases, Nginx is more resource-friendly than Apache which could be used as a web server or reverse proxy.
Table of Contents
Tutorial installation Nginx on CentOS 8
1- Installing the Nginx Web Server
First, you need to use the DNF package manager. It is a new default package manager on CentOS 8.
To install the Nginx package with:
sudo dnf install nginxTo install Nginx, if you are prompted, enter y to confirm the installation. Then run the following command to enable and start the server:
sudo systemctl enable Nginx sudo systemctl start nginx2- Adjusting Firewall Rules
To allow external connections on your Nginx web server, you need to adjust the firewall settings, which runs on port 80 by default.
So enter the below command to permanently enable HTTP connections on port 80:
sudo firewall-cmd --permanent --add-service=http Now, if you need to check the HTTP firewall service was added correctly or not, run the following:
sudo firewall-cmd --permanent --list-all The output should be similar to below:
public target: default icmp-block-inversion: no interfaces: sources: services: cockpit dhcpv6-client http ssh ports: protocols: masquerade: no forward-ports: source-ports: icmp-blocks: rich rules:Reload the firewall service to apply the changes:
sudo firewall-cmd --reload You installed the Nginx server successfully now.
3- Checking your Web Server
To find your server’s public IP address, run the following command
ip addr show eth0 | grep inet | awk '{ print $2; }' | sed 's/\/.*$//' To verify the accessible IP address run below command.
curl -4 icanhazip.comThen, type the result address in your web browser, you would be taken to Nginx’s default landing page:
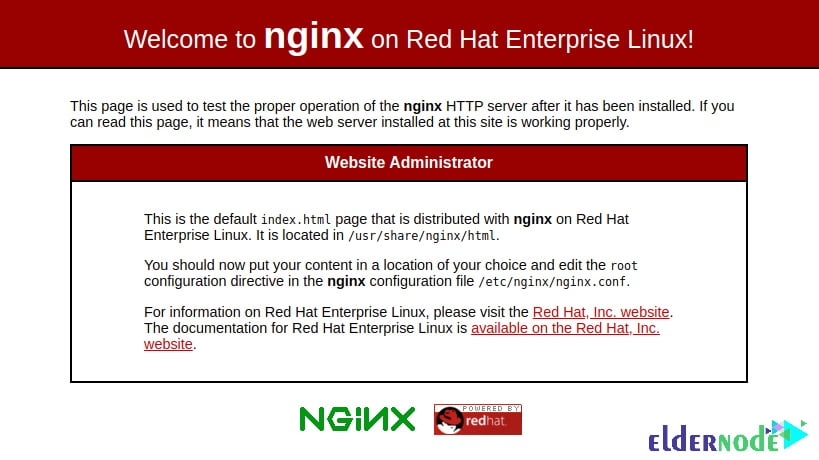
After viewing this page, you can make sure that the webserver is correctly installed.
In the next articles, we will explain about how to Manage the Nginx Process, Get Familiar with Important Nginx Files and Directories and Set Up Server Blocks.
Dear user, we hope you would enjoy this tutorial, you can ask questions about this training in the comments section, or to solve other problems in the field of Eldernode training, refer to the Ask page section and raise your problems in it.