Previously, you have read about VNC on CentOS 7. In this article, we are going to learn you how to install VNC on Debian 10. Vnc (Virtual network computing) is a connecting system that makes software, managing files, and set on a remote server easier for users. Those who are not comfortable with the command line, use VNC to let them use a keyboard and mouse to interact with a graphical desktop environment on a remote server. In the following, you would learn how to use TightVNC, a remote control package, and set up a VNC server on a Debian 10 server and connect to it through an SSH tunnel.
How to install VNC on Debian 10
Prerequisites
The tutorial may be more useful if you know:
1- To set up a Debian 10, visit the Debian 10 initial server setup tutorial, including a non-root user sudo access and a firewall.
2- A computer that supports VNC connections over SSh tunnels.
2-1 On Linux, choose one of the vinagre,krdc, RealVNC, or TightVNC.
2-2 On macOS, use the built-in Screen Sharing program, or a cross-platform app like RealVNC.
2-3 On Windows, you can use TightVNC, RealVNC, or UltraVNC.
Step by step to Install and Configure VNC on Debian 10
Step 1– First Install the Desktop Environment and VNC Server.
As you know, a graphical environment is not installed by default on a Debian 10 server, so we will begin by installing it. And of course, install packages for the latest Xfce desktop environment and the TightVNC package available in the official Debian repository.
Update the list of your packages:
sudo apt updateInstall the Xfce desktop environment on your server:
sudo apt install xfce4 xfce4-goodiesIf you are prompted to select a keyboard layout, choose an appropriate for your language and press Enter. Then the installation will continue. Once the installation completes, install the TightVNC server:
sudo apt install tightvncserverUse the vncserver command to set up a secure password and create the initial configuration files to complete the configuration of the VNC server.
vncserverThen, you must enter and verify a password to access your machine remotely:
Output You will require a password to access your desktops. Password: Verify: The password must be between six and eight characters long. But a password more than 8 characters will be truncated automatically. If you log in with the view-only password, you will not be able to control the VNC instant with their mouse or keyboard. To create the default configuration files and connection information for the server:
Would you like to enter a view-only password (y/n)? n xauth: file /home/noodi/.Xauthority does not exist New 'X' desktop is your_hostname:1 Creating default startup script /home/noodi/.vnc/xstartup Starting applications specified in /home/noodi/.vnc/xstartup Log file is /home/noodi/.vnc/your_hostname:1.log
Step 2– Configuring the VNC Server
VNC needs to verify, to which graphical desktop it should connect to. the commands are available in a configuration file called xstartup in the .vnc folder under your home directory. When you ran the vncserver command, the startup script was created. After setting up the VNC, it launches on port 5901. Which is referred to by VNC as : 1. Of course, it can launch multiple instances on other display ports, like : 2, : 3. As you may change how the VNC server is configured, you should first stop the VNC server which is running on port 5091 with the following command.
vncserver -kill :1 You may see a different PID, however, the output will look like below:
Output Killing Xtightvnc process ID17648By entering this command before modifying the xstartup, you can back up the original.
mv ~/.vnc/xstartup ~/.vnc/xstartup.bakNow create a new xstartup file and open it in your text editor:
nano ~/.vnc/xstartupYou need VNC to start your desktop environment if you have not done it before. Add below commands to the file:
~/.vnc/xstartup #!/bin/bash xrdb $HOME/.Xresources startxfce4 &.Xresources is where a user can make changes to settings for the graphical desktop. You need to make the VNC server executable to make sure that it would be able to use this new startup file.
sudo chmod +x ~/.vnc/xstartup You should restart the VNC server here.
vncserverThe output may display as below.
Output New 'X' desktop is your_hostname:1 Starting applications specified in /home/noodi/.vnc/xstartup Log file is /home/noodi/.vnc/your_hostname:1.logStep 3 – Connecting the VNC Desktop Securely
You should use the SSH tunnel to connect securely to your server because the VNC does not use secure protocols. So, create the SSH connection to forward the localhost connection for VNC. Do this via the terminal on Linux or macOS with the following command:
ssh -L 5901:127.0.0.1:5901 -C -N -l noodi your_server_ipNote: Replace noodi and your_server_ip with the non-root username and IP address of your server. And use your_server_ip as the connection IP, and set localhost:5901 if you are using a graphical SSH client, like PuTTY.
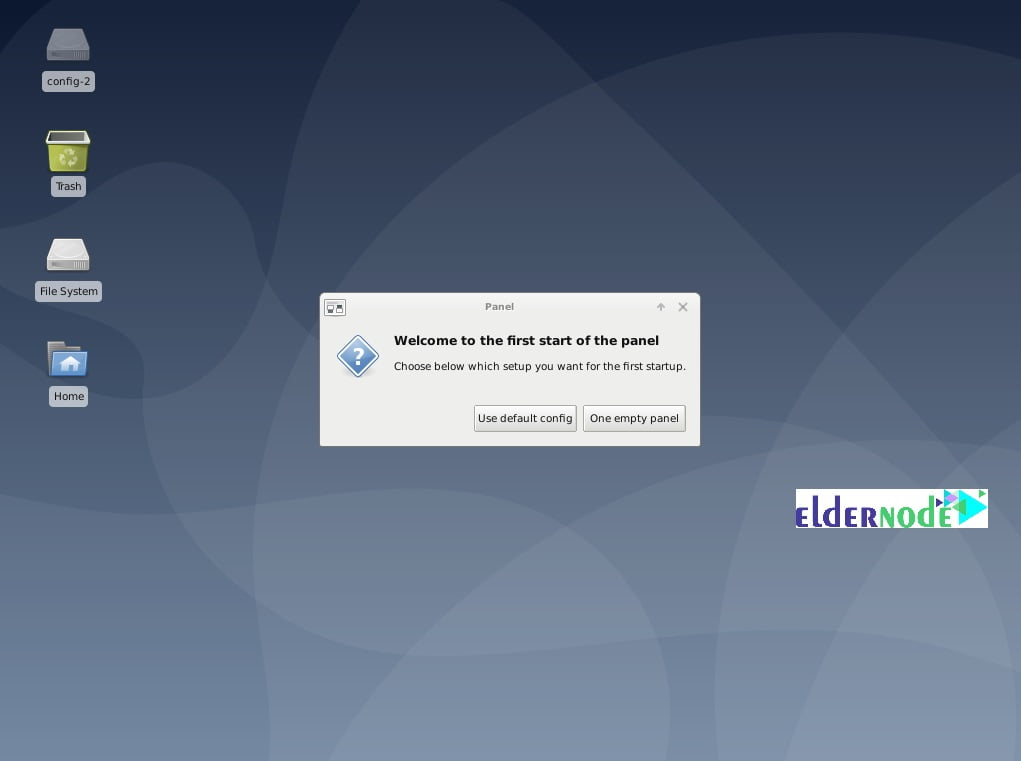
You will see the default Xfce desktop, once you are connected.

When you click the Use default config, you will configure your desktop quickly.
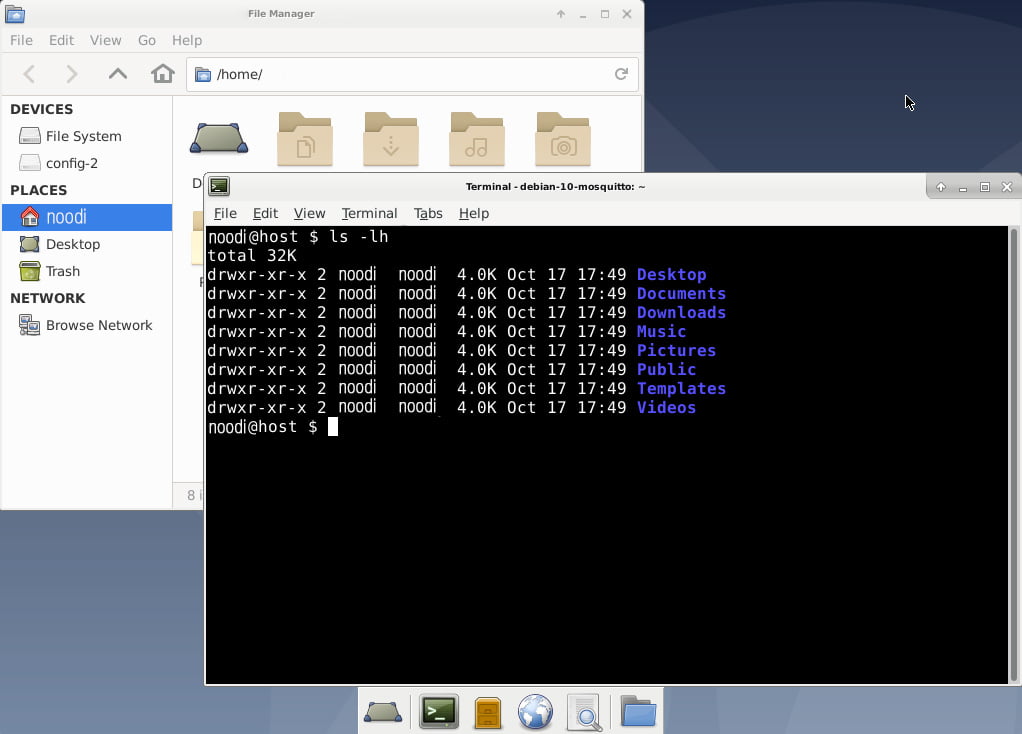
To have a file manager or the command line, you can access files in your home directory as you see below:

You can use CTRL+C to stop the SSH tunnel, this would disconnect your VNC session.
Step 4– Running VNC as a System Service
As a systemd service, you can start, stop, and restart the VNC server after set up it. So first create a new unit file called /etc/systemd/system/[email protected] using your text editor.
sudo nano /etc/systemd/system/[email protected]If you question the @ symbol, it let you pass in an argument that you can use it in the service configuration. When you manage the service, you can use it to specify the VNC display port you want to use.
Add the following lines to the file. Be sure to change the value of User, Group, WorkingDirectory, and the username in the value of PIDFILE to match your username:
[Unit] Description=Start TightVNC server at startup After=syslog.target network.target [Service] Type=forking User=noodi Group=noodi WorkingDirectory=/home/noodi PIDFile=/home/noodi/.vnc/%H:%i.pid ExecStartPre=-/usr/bin/vncserver -kill :%i > /dev/null 2>&1 ExecStart=/usr/bin/vncserver -depth 24 -geometry 1280x800 :%i ExecStop=/usr/bin/vncserver -kill :%i [Install] WantedBy=multi-user.target The ExecStartPre command stops VNC.
The ExecStart command starts VNC and sets the color depth to 24-bit color with a resolution of 1280×800.
Save and close the file.
Now, make the system aware of the new unit file enter the below command.
sudo systemctl daemon-reloadThen enable the unit file.
sudo systemctl enable [email protected]To stop the current instance of the VNC server:
vncserver -kill :1To start it as any other systemd service:
sudo systemctl start vncserver@1To verify that it started with this command.
sudo systemctl status vncserver@1While it is starting correctly, the output should look like as below:
[email protected] - Start TightVNC server at startup Loaded: loaded (/etc/systemd/system/[email protected]; enabled; vendor preset: enabled) Active: active (running) since Thu 2019-10-10 17:56:17 UTC; 5s ago Process: 935 ExecStartPre=/usr/bin/vncserver -kill :1 > /dev/null 2>&1 (code=exited, status=2) Process: 940 ExecStart=/usr/bin/vncserver -depth 24 -geometry 1280x800 :1 (code=exited, status=0/SUCCESS) Main PID: 948 (Xtightvnc) . . .
The VNC server will now be available when you reboot the machine.
Now Start your SSH tunnel again:
ssh -L 5901:127.0.0.1:5901 -C -N -l noodi your_server_ipTo connect to your machine, make a new connection by your VNC client software to localhost:5901.
Dear user, we wish this tutorial would be helpful for you, to ask any question or review the conversation of our users about this article, please visit Ask page. Also to improve your knowledge, there are so many useful tutorials ready for Eldernode training.


