In this step-by-step article, we embrace you to the process of install libbpf on Ubuntu 22.04, making it simple even for a beginner to understand the process.
Libbpf is a special-purpose open-source library used to access eBPF technology. This technology is a f.e. an embeddable programmable engine in the kernel of linux. With libbpf high level eBPF assembly code and associated data can be generated and run which allows to create many efficient data processing applications aimed towards network and security solutions.
At the end of this article, we will detail the procedures accompanied by codes so that everybody understands and performs. If no coding experience at all you will still benefit from this guide as well in order to get libbpf working on Ubuntu 22.04.
Don’t quit on the installation process. Follow the detailed steps outlined here and unleash the full functionality of libbpf on the Ubuntu 22.04 operating system, without delay. Let’s get to it!
Table of Contents
Prerequisites for installing libbpf
To begin with, you should ensure that you have an Ubuntu 22.04 system in your possession. It is noted however that for those with older versions of Ubuntu, this installation system may differ a bit and commands will have to be changed in relation to that system.
You are also required to get your system ready by installing other necessary development tools and resources. This implies obtaining the GNU Compiler Collection (GCC) Make and other building tools. These tools will enable you to compile the source code of the library bpf and install the library in your system.
Also Linux kernel headers have to be installed as well. This is due to the fact that some libbpf low level calls are wrapper around the corresponding operations of the Linux Kernel, hence header files are needed. Linux kernel headers are normally installed using linux-headers-generic package which is quite efficient.
Step 1: Update Your System
It would be prudent to verify the user’s operating system before going to step 2 however which the deployment of the operating system offers is the installation of ubuntu 22.04.
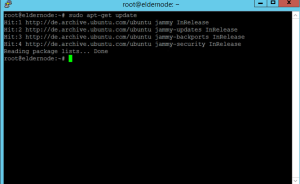
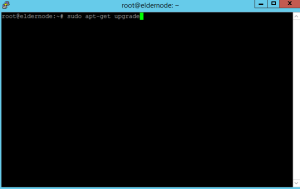
To do that, click on terminal and then the following commands will be run:
sudo apt-get updatesudo apt-get upgradeMany will possess re-imagining tools or program, the cyberghost as regards the update and upgrade options. After this function, your operating system will have the current enhancing and security progs.
Step 2: Installing required dependencies
This section also demonstrates the steps followed in building and installing libbpf, it demands that you install some additional libraries on your system. In order to perform tasks, these libraries involve the necessary build traits as well as some packages that delicately fit to the internal structure of libbpf.
To do this, invoke the following command to obtain the pertinent libraries:
sudo apt-get install -y git make gcc libelf-dev libzstd-devThe following package will be installed by this software installation command:
git: it manages the version of the code and enables the downloading of the libbpf source code.
make: It is important to look for the purpose of ‘make’ in a software development installation and using it.
gcc: Abbreviation of GNU is critical in compiling the source code.
libelf-dev: it is a programming interface that enables both the reading and writing of ELF Executable and Linkable Format files which are featured in libbpf.
libzstd-dev: It is a lossless compression library with fast algorithms which is employed for the use of libbpf.
When these dependencies are done installing you are good to continue to the next step.
Step 3: Clone the libbpf Repository
The next step is to download the source code of the libbpf after you have successfully installed the requirements. It can be done by cloning the official libbpf repository on GitHub.
Open a new terminal window and type or copy and paste the following command:
git clone https://github.com/libbpf/libbpf.gitThis will create a subdirectory called libbpf under your current working directory which will house the libbpf source code.
Once the process of cloning is done, you should be able to use the command below to cd to the libbpf directory:
cd libbpfStep 4: Build and Install libbpf
At last, it is time to compile and install libbpf source code which has been downloaded on your Ubuntu 22.04 system. This procedure is quite simple and only requires several steps to be completed:
Open the src folder in libbpf:
cd srcThen use the make command to build the libbpf library:
makeThese operations will compile the source codes and also give the necessary object and library files.
Install the library by using the make install command on the libbpf library
sudo make installThis will further install the libbpf library and headers which will allow their usage in any of the applications that will be installed on your Operating System.
In as much as installation directory is the basic problem in the case with many engineering. You will by default find the installation of the libbpf library located at /usr/local/lib and similarly the header files will be located at /usr/local/include. In case, there is an intention to perform the installation of the library in path other than those specified as default, the PREFIX environment variable may be set before proceeding to perform make install without having to change the location of all the files.
Step 5: Verify Installation
In order to confirm whether the libbpf module has been successfully installed, proceed to the following command in terminal at any supported distro:
pkg-config --modversion libbpfIf there’s a version number output, then you are good to go since libbpf has now been installed on your system!
Conclusion
Congratulations! You have now finished the process of installing libbpf on Ubuntu 22.04. Thereafter, you at this point can begin to take advantage of this amazing library for handling BPF programs integration with the kernel.