The Fedora Project, technically known as the Fedora Core, was officially launched in late 2003. That was when Red Hat Linux stopped working. The Linux version of RedHat was the only version of Linux supported by RedHat, and this Linux distribution was sold for a fee and commercially. While Fedora Core is a Linux that is public and free. RedHat decided to invest in Fedora Core, and newer versions of RedHat Linux, known as RedHat Enterprise, were based on Fedora Core. In this article, we try to learn How to Install Fedora on VPS Server. You can visit the packages available in Eldernode to purchase a Linux VPS server.
Table of Contents
Tutorial Install Fedora on VPS Server step by step
In 2002, Warren Togami started the Fedora project as a student project. The main purpose of creating such a project was to make it possible for others to use RedHat software packages. By using these packages in a single set, users were able to find and develop software related to this operating system.
The main difference between Fedora and RedHat is that the Fedora project, unlike the RedHat, is a voluntary and public project. But RedHat is a commercial product and its developers are also RedHat. Eventually, the Fedora Core Linux project fascinated its users and spread quickly. The most important reason for its development is the Collaborative system, which is inherent in Open-Source software. Follow us in this article to learn how to install Fedora on VPS Server.
Features of Fedora 33
In this section, we will discuss 8 features of Fedora 33:
1. It has a Linux 5.8 kernel.
2. Btrfs is the default file system.
3. Easy management with a modern and powerful Cockpit user interface.
4. You can introduce additional modularity.
5. It is possible to remove unnecessary packages.
6. Smaller installer footprint
7. Server roles are another feature of this version.
Install Fedora on VPS Server
In this section, we are going to learn how to install the latest released version of Fedora, which is Fedora 33. In the first step, you need to download Fedora 64-bit live image.

After you have successfully downloaded the file, the next step is to create a CD/DVD or USB flash drive using the Unetbootin or dd command. Now we go to the installation steps of Fedora.
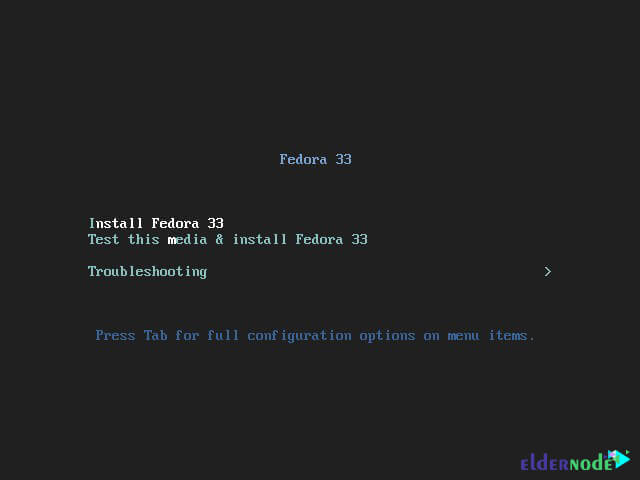
The first step is to select an active media/port. After doing this, you must insert your bootable media. Now, you are faced with two options. In the first option, you can install Fedora 33 immediately. In the second option, you can test the installation media for any errors before starting the installation process.
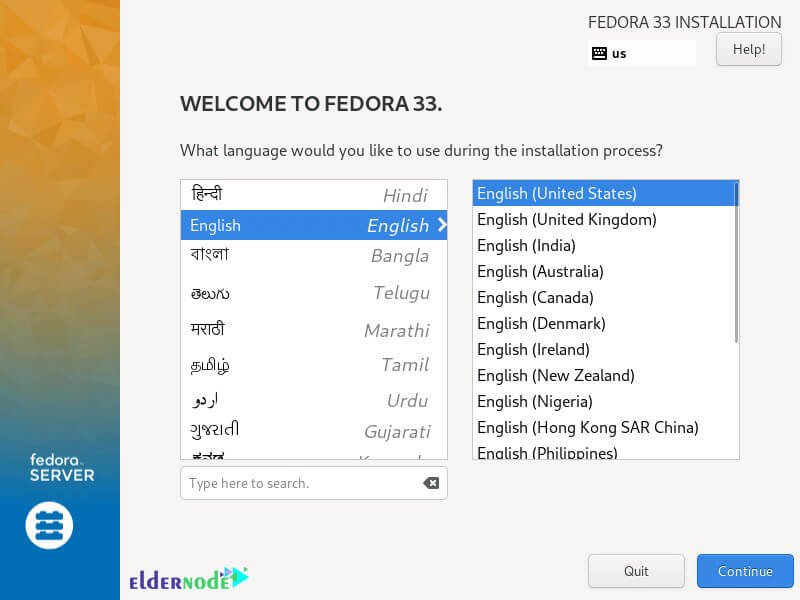
Then, you must select your preferred language. Then click Continue.
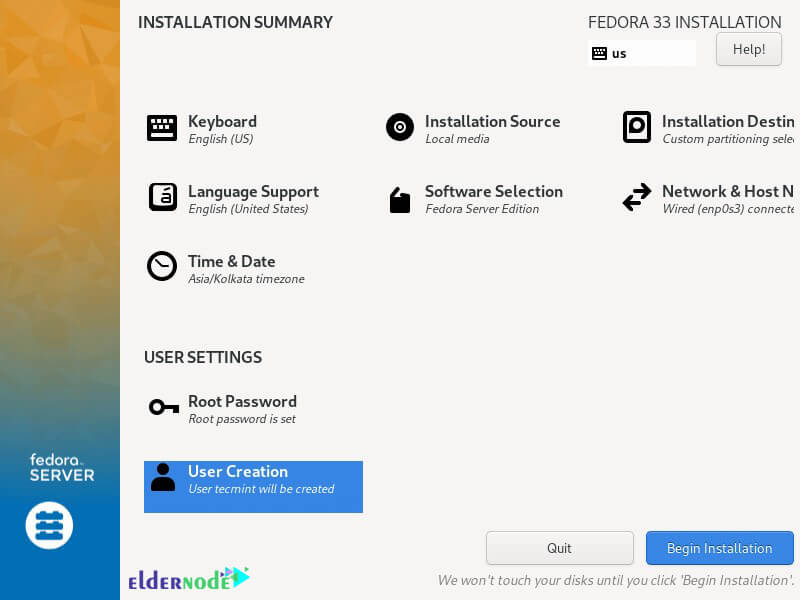
The next step includes the installation summary. You can make system settings such as keyboard layout, language support, system time and date, installation source, installation software, network and hostname, installation destination in this section.
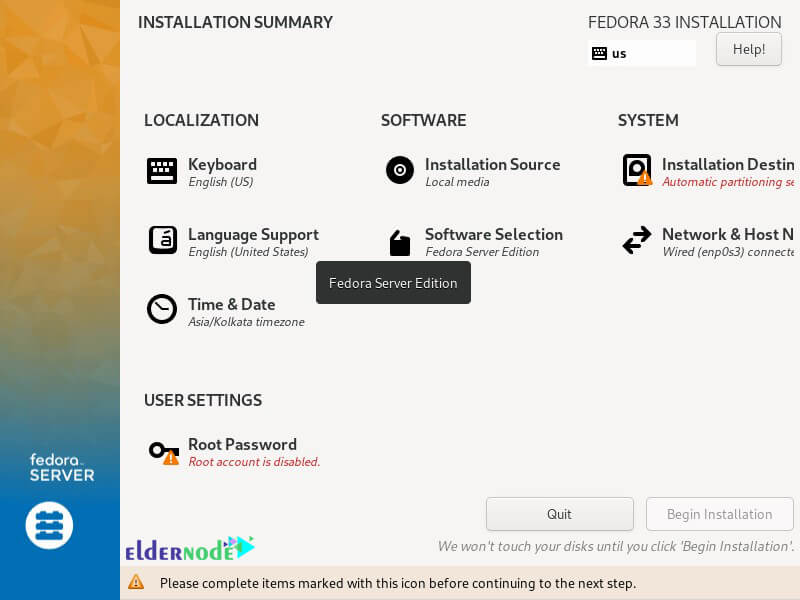
Full installation of Fedora requires adjustment of all the above. Therefore, in the continuation of this article, we will explain to you how to set up and configure the options in the image above.
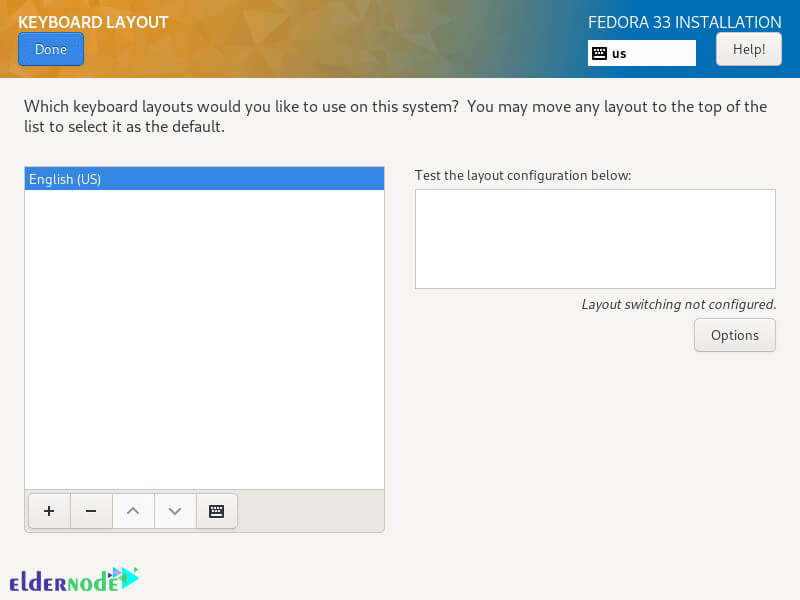
How to Setup Keyboard Layout (Install Fedora on VPS)
As you can see in the image below, you can use the + sign to add the keyboard layout. So you have to click on Add and then simply click Done.
How to Configure Language Support
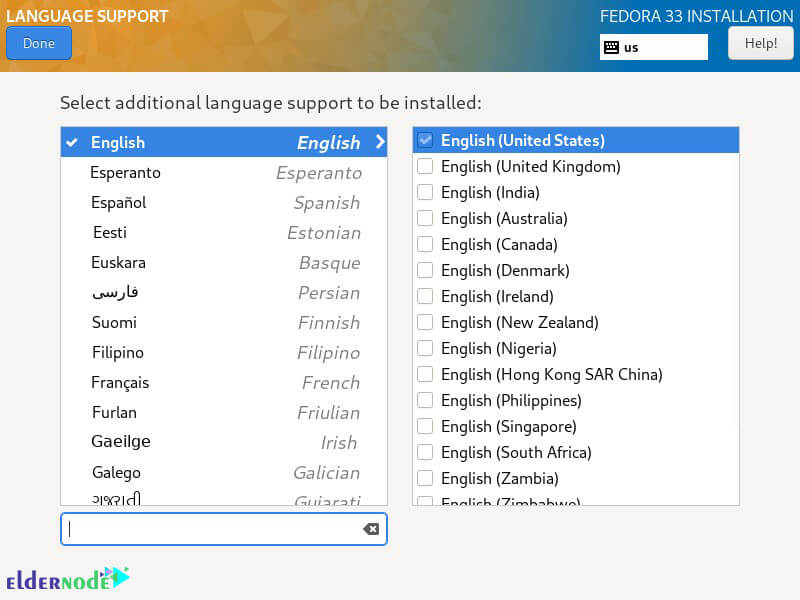
In the language support configuration step, you must set the support language. So search for the language you want and choose from the available options. Then click Add to install it. Finally, click Done to complete the settings.
How to Configure System Time and Date
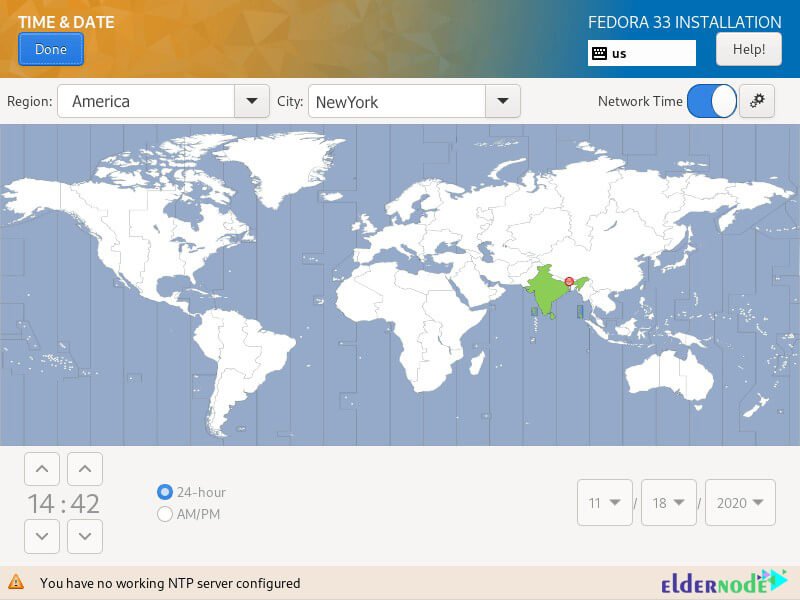
This step is about configuring time and date settings. Given the importance of time management on the server, you need to fine-tune it. As you can see in the image below, you have to select your desired location from the Region and City section. Then click Done.
How to Configure Installation Disk in article Install Fedora on VPS
The important point for this section is that there are two ways to set up partitions. The first method is to use automatic settings and the second method is to do the settings manually. In this section, we are going to configure manually. To do this, click on the disk image. Then select “Custom“. Finally, click on Done.
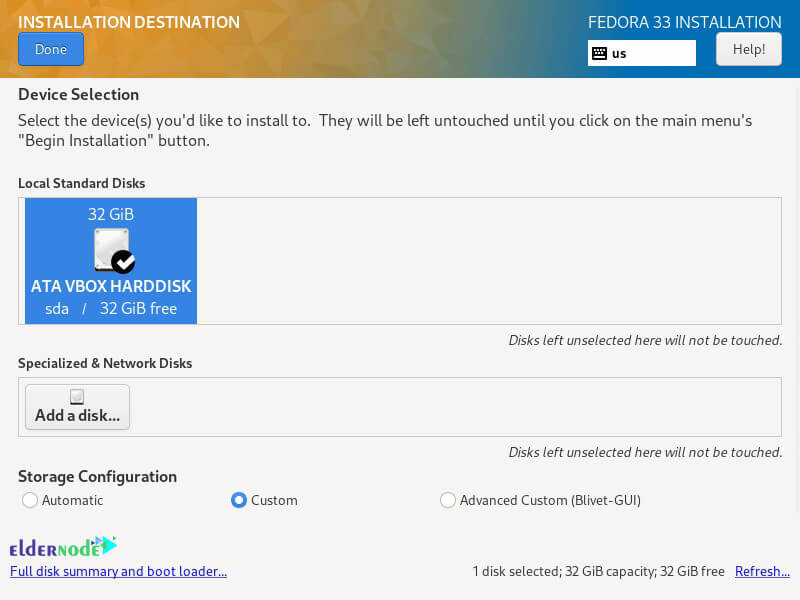
In the next step, you need to select “Standard Partition” from the drop-down menu to create installation points for the various partitions you create in your system.
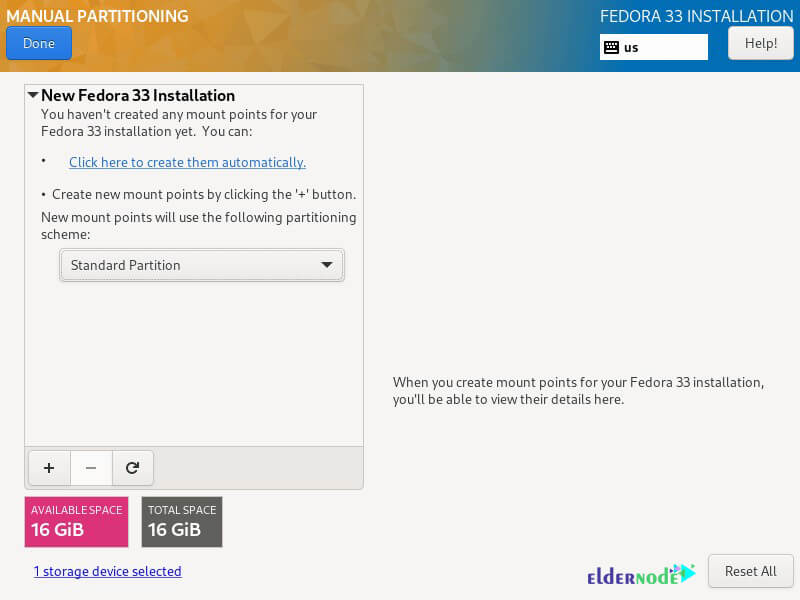
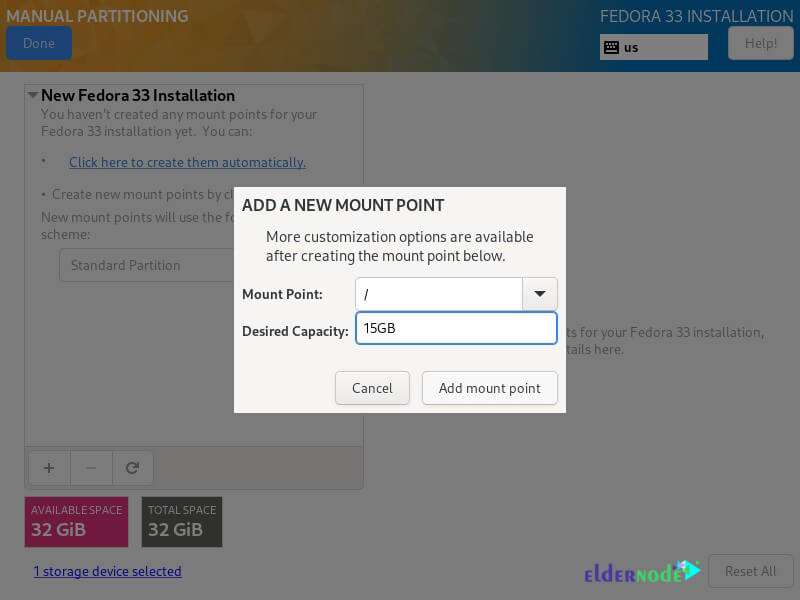
It should be noted that you can use the “+” button to add a new partition. To create a root (/) partition, you can specify the following. The partition size in the example below is for guidance, and you can adjust the capacity of your system according to your disk size. Finally, you have to click on “Add Mount point“.
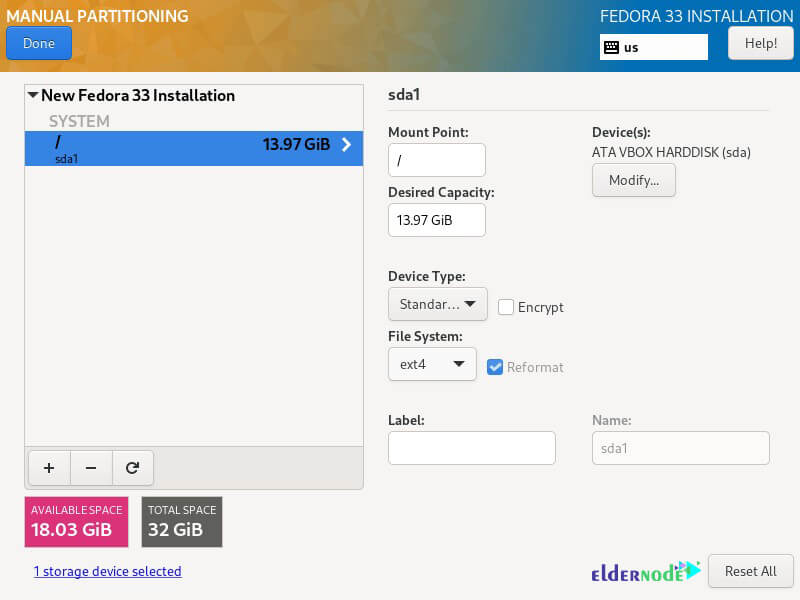
Note that each type of Linux system partition requires a file system. So we use ext4 to set up a file system for the root file system created in the previous step.
Next, you need to create a home partition and installation point. So you can simply click on the “Add installation point” setting to do this.
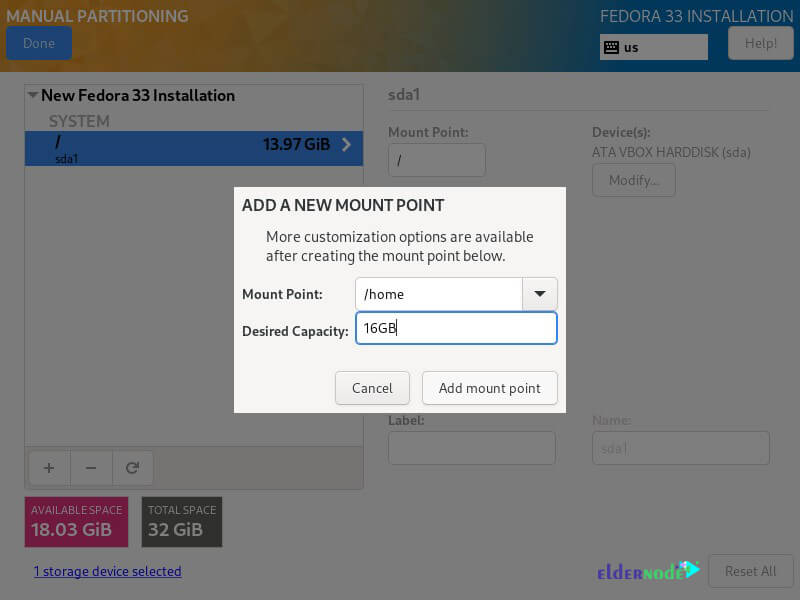
It should be noted that you also need to set the file system type for the partition system, which we used ext4.
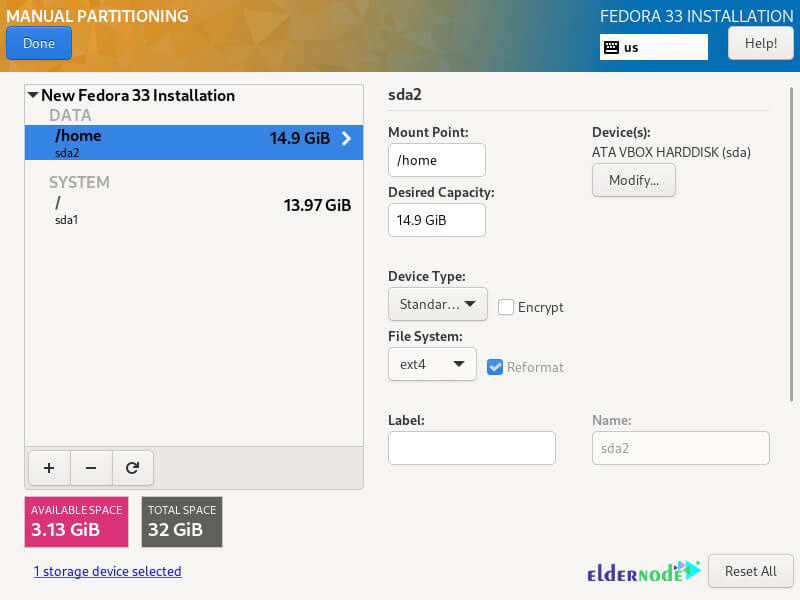
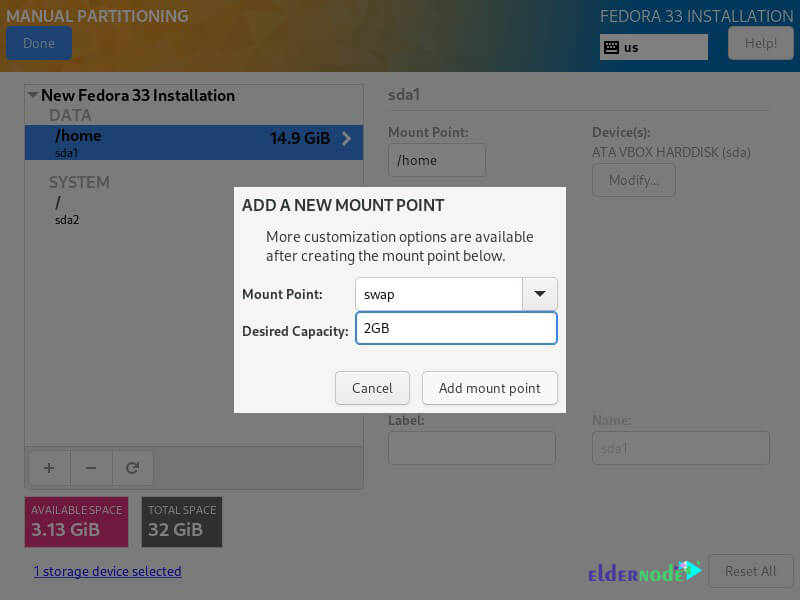
In the next section, which is one of the important steps, you must create a swap partition on the hard disk. This partition is dedicated to temporarily storing additional data in the system RAM. After doing this, click on “Add Mount point” to create this partition. Then click Done in the upper left corner of the image to apply the settings.
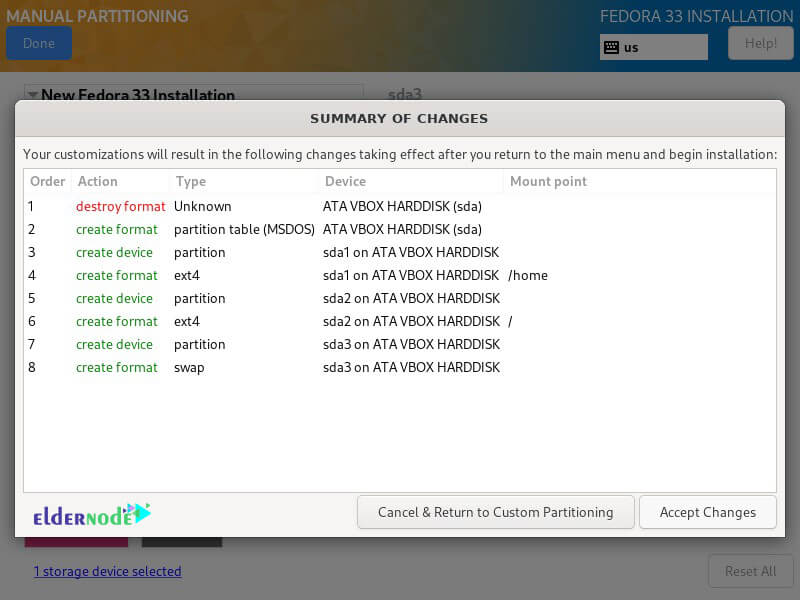
Finally, after viewing the image below, click to “accept changes“.
How to Setup Network and Hostname in article Install Fedora on VPS
Click “Network and Hostname” on the configuration page. In this step, you can select the hostname and then click Apply. You can also click the “Configure” button to configure system network settings.
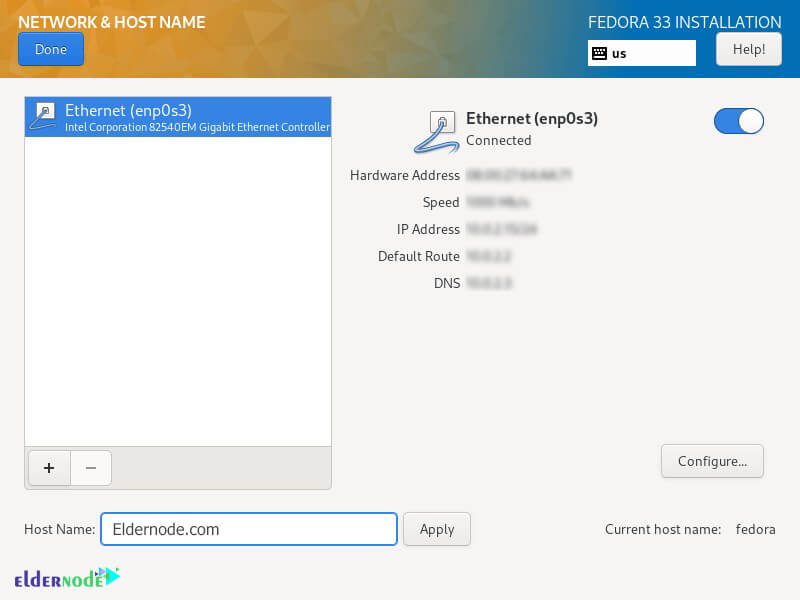
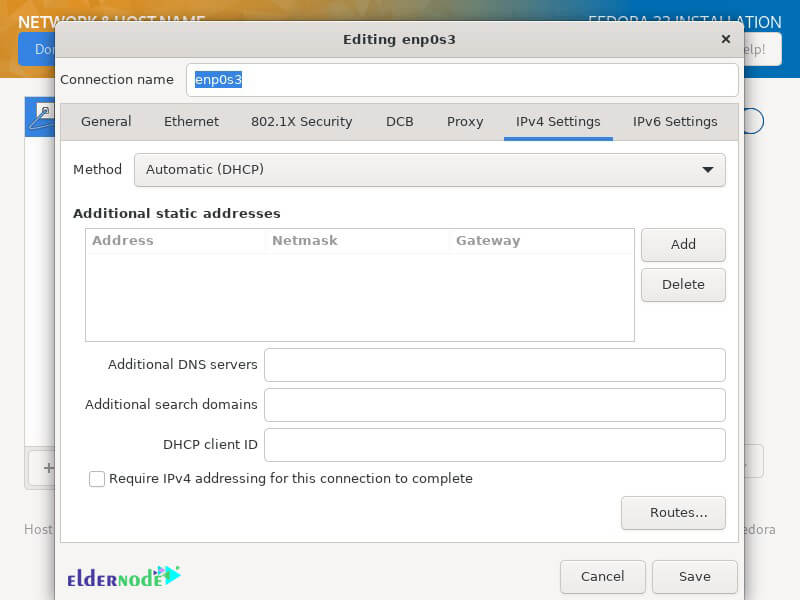
In this section, as you can see in the image, you can configure many network settings. To perform the configuration you have to click on the drop-down menu of the manual adjustment method. Go to settings to set other features. After setting all items, click Save and then click “Done” in the upper left corner.
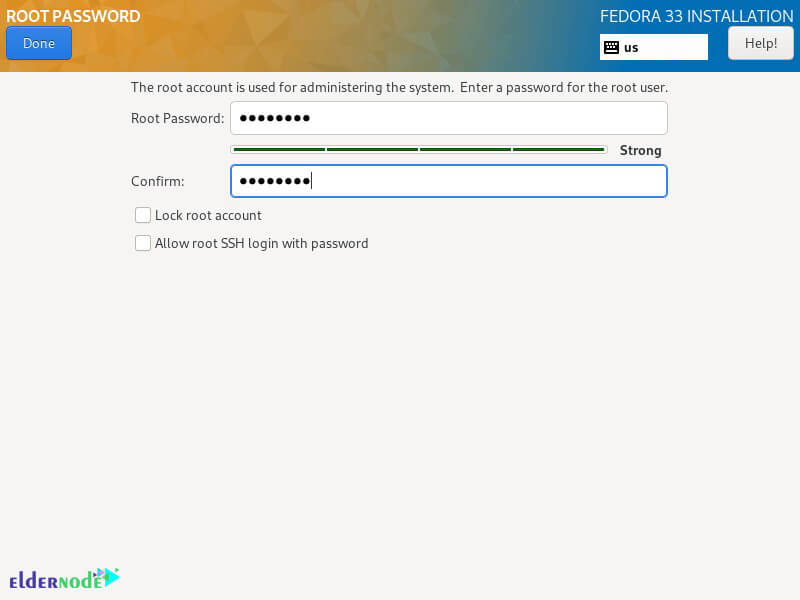
After you have successfully completed the above steps, in this step you will need to set the main user password and an additional system account. So click on “ROOT PASSWORD“. Then click Done.
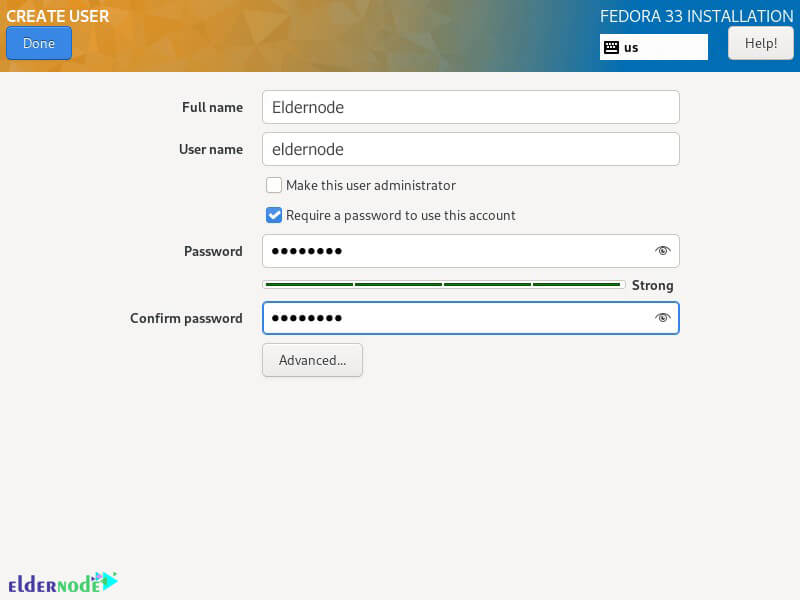
You can click on “USER CREATION” to create an additional account. Click Done after filling in the required fields.
Finally, you can start installing Fedora by clicking “Begin Installation“.
Finally, click on Reboot System to complete the installation and configuration of Fedora.
Conclusion
Different versions of different operating systems have been produced and released that most users may not be familiar with. One of these operating systems is called Fedora. Fedora is a Linux-based operating system. Users who are interested in Linux operating systems are fully acquainted with this version and it is one of the most popular versions of Linux. In this article, we tried to introduce you step by step to How to Install Fedora on VPS Server.

