Plesk is a comprehensive control panel that has many capabilities like other panels such as cPanel. Users feel free to choose this functional panel since it supports various features and components. Plesk has its own components such as firewall, different various of PHP, email service management, and so on. They are not installed by default and also is not needed to be installed during the initial installation. But what if you need a component after a while? In this article, you will learn How To Install And Enable PHP 8 On Plesk. Find your preferred VPS hosting plans and purchase one to be supported by the Eldernode team 24/7.
Table of Contents
Tutorial Install And Enable PHP 8 On Plesk
Plesk is a web hosting and server data center automation software with a control panel developed for Linux and Windows. The model of Plesk’s user management is designed for dedicated and shared hosting. As an administrator, you will be able to set up new websites, reseller accounts, email accounts, and edit and create DNS entries through a web-based interface.
How to add and remove component on Plesk
Plesk supports multiple PHP versions and handler types of the box. Let’s see how the Plesk administrator can install PHP on the server. The steps below are the solution.
1- Enter the Administrator environment of the Plesk panel.
2- From the bar on the right and the section of System Overview, click on the Plesk version. From the opened popup, select the Add or Remove Component option.
3- Then, you will see all the components of Plesk.
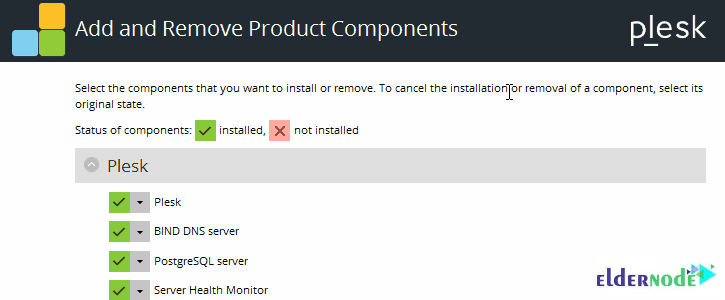
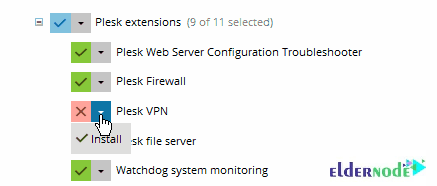
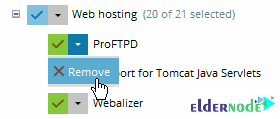
The green icon means the component is installed, the pink icon indicates that it is not installed. The blue icon says that not all components in the group are installed. As you see, groups with all components installed are marked with the green icon, and those with no components installed are marked with a multiplication sign.
4- Select your considered component and click on install.
5- When you selected your preferred components, click on Continue.
6- Wait for components to be download and install.
7- Once the installation is complete, you will see the message ”All operations with products and components have been successfully completed”.
8- Click on OK to be redirected to the main page of the Plesk control panel administrator.
To mark a component for removal, click on the icon that is next to the component’s name > Remove. Also, you can mark all components in a group for removal. When you marked all components you want to install or remove, click Continue to begin the installation or removal.
But if you decide to exit the Plesk Installer without making any changes, click Cancel modifying.
How To enable PHP 8 On Plesk
PHP is a widely used and open-source web programming language that is suited for web development and can be embedded into HTML. Plesk provides support for multiple PHP versions and handler types out of the box.
Various changes in PHP modules have been taken and content management systems and plugins need to use the best options and modules to improve. While you are installing and using a plugin, you may face an error that your PHP version is not compatible. To solve it, you can change the PHP version in your panel to let the plugin or content management system continue working without any problem.
Follow the below steps to set PHP on the Plesk control panel:
1- Log in to Plesk
2- Go to Tools & Settings > PHP Settings
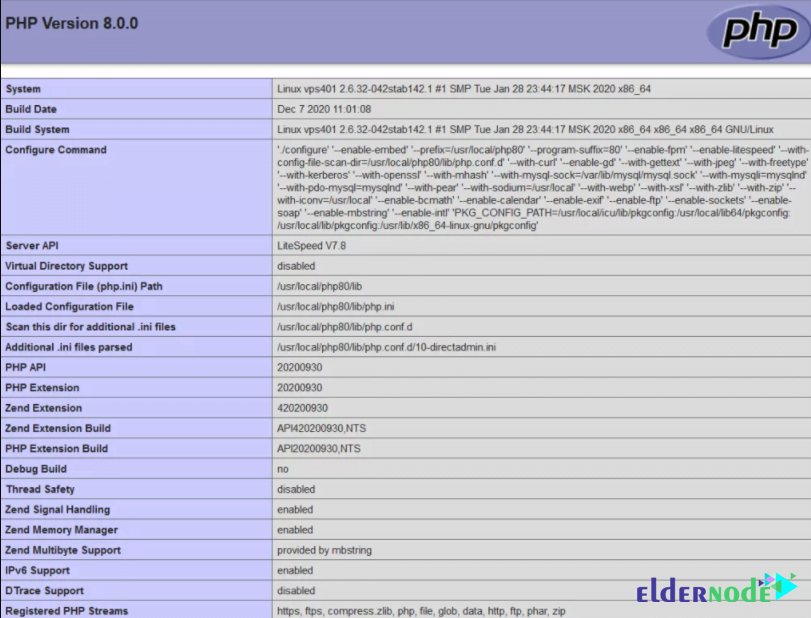
3- You will see all the supported versions, select your preferred version.
4- Select your considered version, set your preferred performance and common settings, and click ”Save”. After a while, the version will be changed and you will be redirected to the main page. then, you see the version has been changed in the PHP Setting section.
Conclusion
In this article, you learned How To Install And Enable PHP 8 On Plesk. To complete your knowledge about Plesk, read more articles and share them with your friends on Eldernode Community.