How to Disable Auto-Update in Windows 10. Disabling auto-update in Windows 10 is a bit more complicated than other windows. The reason for this complexity is the removal of update type options for users who had it in previous windows.
There are several ways to prevent Windows 10 updates. In this article, we will teach you one of the methods that will surely answer you.
Note: We recommend that you never stop the Windows update due to security issues as well as receiving security updates. If you close it, update it manually from time to time to avoid possible dangers.
Disable Windows 10 Auto-Update
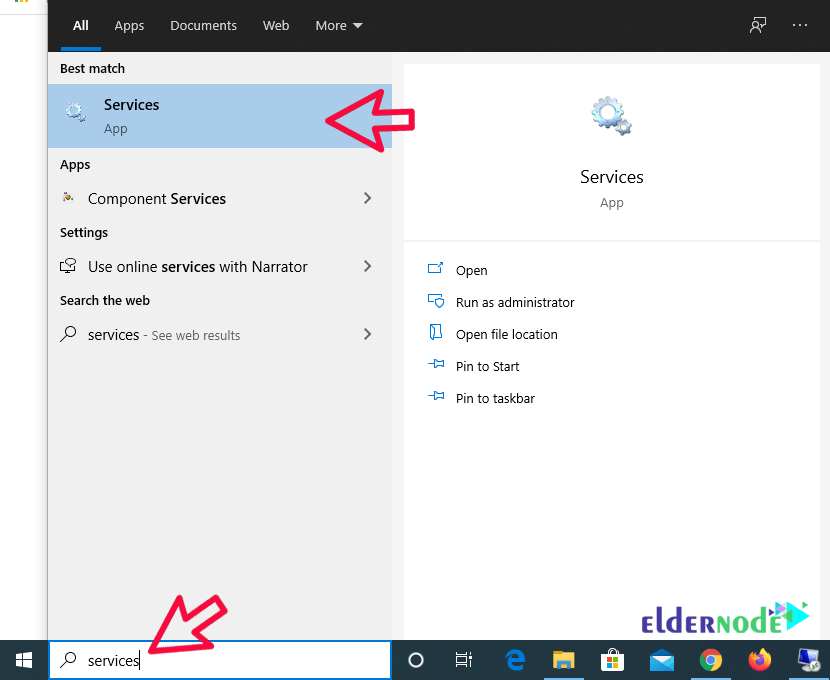
1. In the first step, search for Services in your start bar and open it.
2. In the Services window, find the Windows Update service and double-click on it to open it.
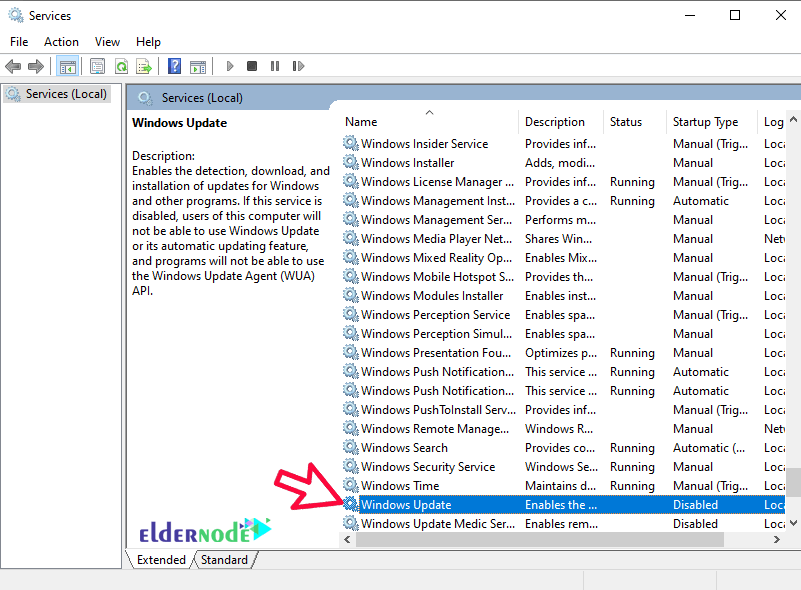
3. In this section, set the Startup type option to Disable and click Apply.
Stop after applying the service.
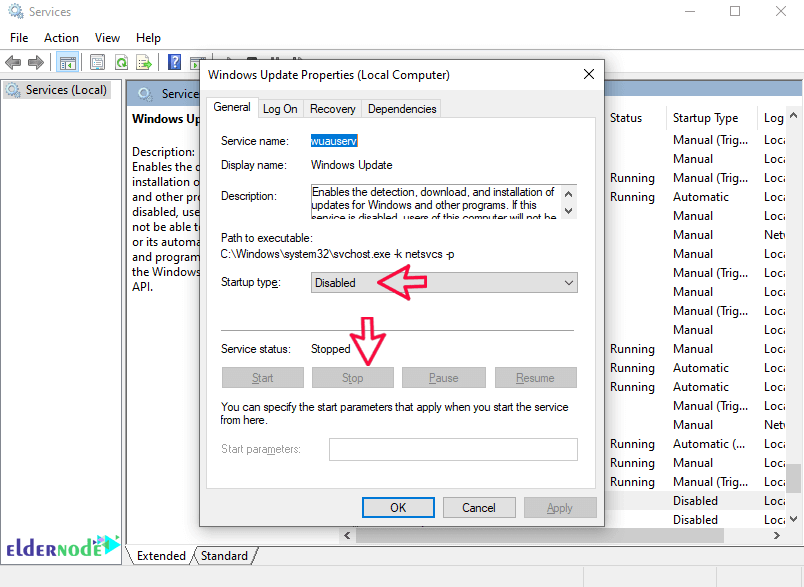
After completing this step, your Windows Update service will be disabled.
Now you must prevent this service from restarting and updating it.
4. From the Start menu, search for Task Scheduler and after finding it, open it.
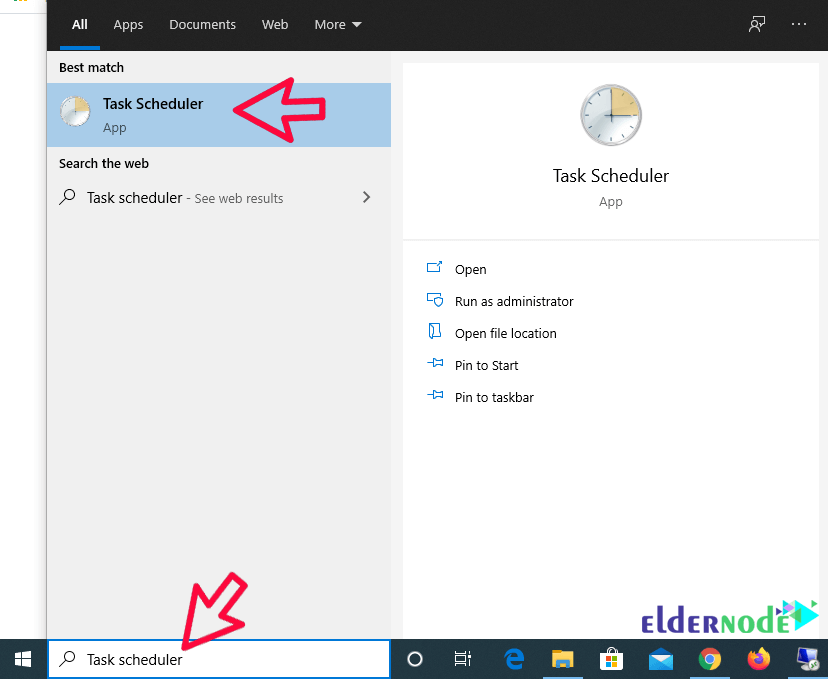
5. In this section, go to the Windows Update directory in the following order:
Microsoft > Windows > Windows Update
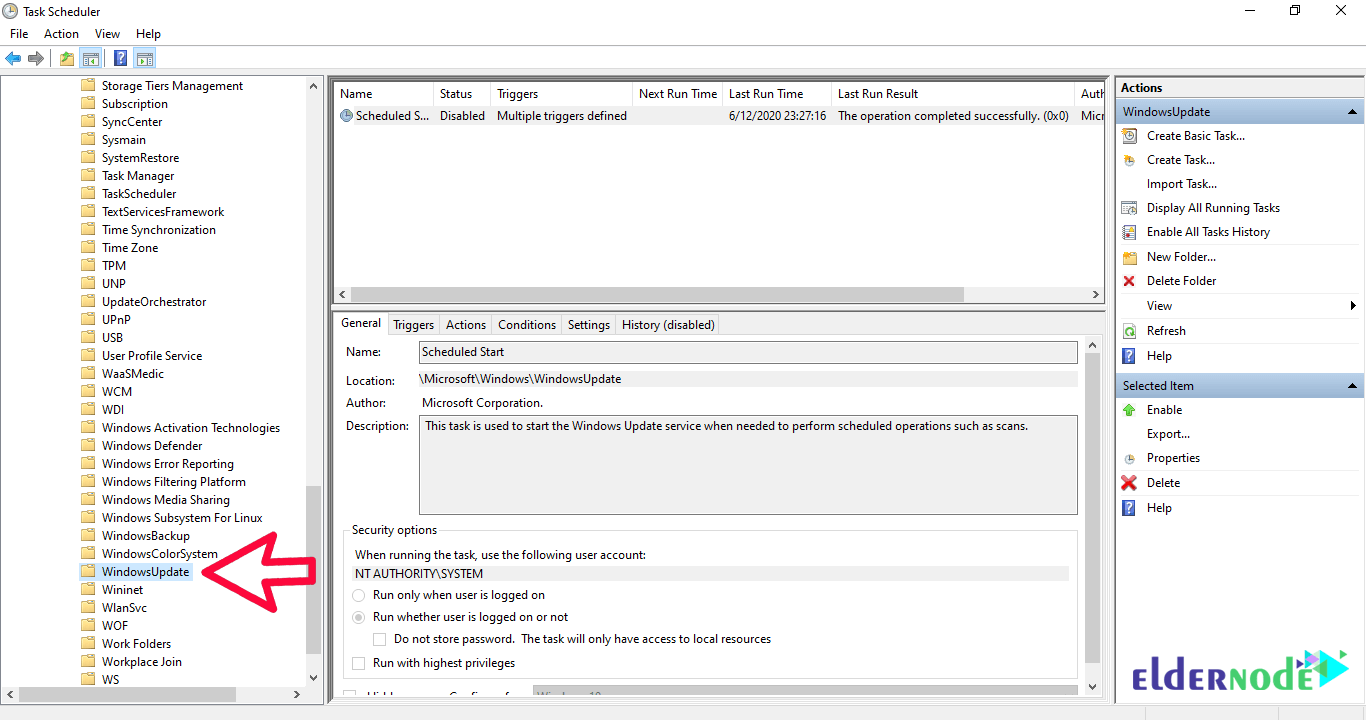
6. Select all the tasks defined in this section and delete them.
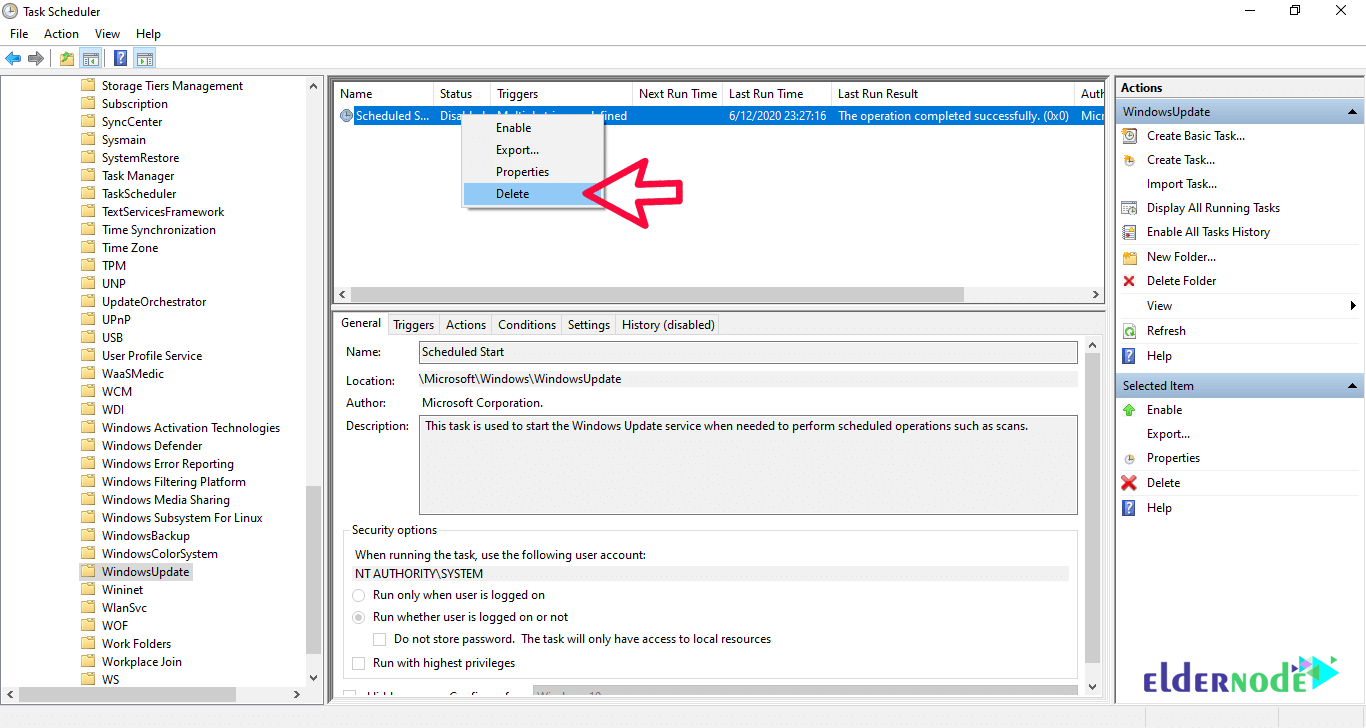
This way you prevent your Windows update and no longer need to set another section.
Dear user, we hope you would enjoy this tutorial, you can ask questions about this training in the comments section, or to solve other problems in the field of Eldernode training, refer to the Ask page section and raise your problem in it as soon as possible. Make time for other users and experts to answer your questions.
Goodluck.
