Similar to every single WordPress Plugin, the XML Sitemaps Plugin is used to improve SEO. It helps search engines like Google, Bing, Yahoo, and Ask.com to better index your site by creating special XML sitemaps. If you wish to notify all major search engines about your new content, XML Sitemaps Plugin will do this once you create a post. Using this plugin allows you to create sitemaps easily. Also, you can sitemap without the baggage of a comprehensive SEO plugin. With over two million downloads, Google XML Sitemaps is the most popular dedicated sitemap plugin for WordPress. Join us with this article to review Tutorial Configure XML Sitemaps Plugin.
Table of Contents
Top way to Configure XML Sitemaps Plugin on WordPress
XML Sitemaps Plugin generates XML and HTML sitemaps. In this way, Google and other engines will index your pages and posts. When you start using a sitemap, crawlers would see the structure of your site and retrieve it more efficiently. It supports all kinds of WordPress posts, including general posts or any custom post type. If you need a sitemap but do not want an on-page SEO plugin, you should install just this plugin.
The Google XML Sitemap does not take much space. Whether you are a newbie or not, it would not be difficult to use this plugin since the options are pretty self-explanatory.
Stay with us to review the required steps Configuring the XML Sitemaps Plugin.
How To Install Google XML Sitemaps Plugin in WordPress
To start the main section of this guide, we assume that you have not installed this WordPress plugin before. It is not a complicated process at all. So, just follow the below path to install XML Sitemaps Plugin:
1- Log in to your WordPress dashboard as the administrator.
2- In the left-hand panel, click Plugins, Click Add New.
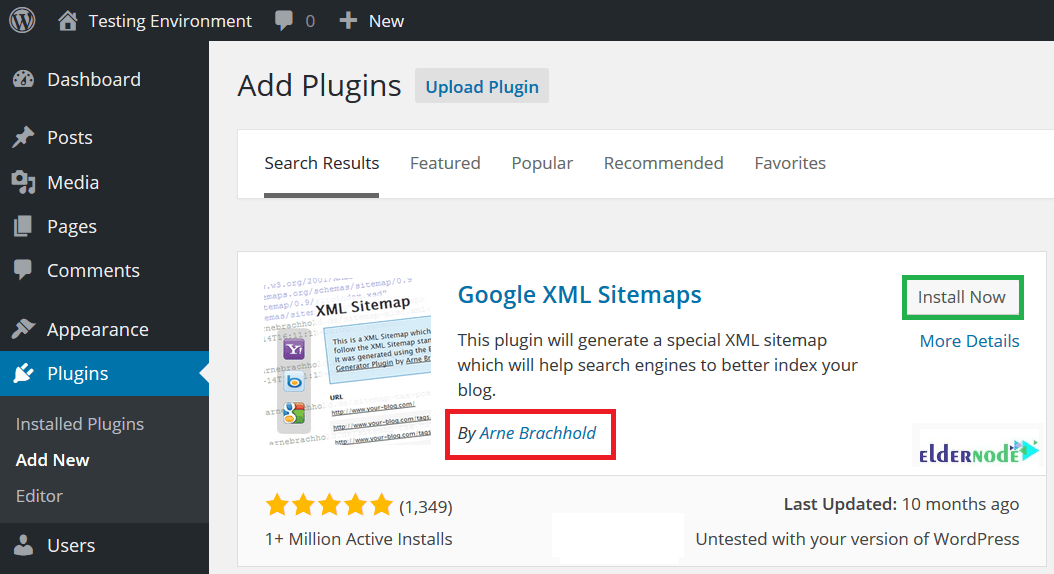
3- Type google XML sitemaps in the Search text box. Then, click Search Plugin.
Note: Since you may find more than one result, check for the author of the plugin. Make sure to download the correct plugin. The author of the XML Sitemaps plugin is Arne Brachhold.
4- Once you find it, click Install Now.
5- After a successful installation, click Activate Plugin link.
In this way, Google XML Sitemaps will generate your first sitemap automatically, taking a snapshot of your website in its current state. Also, you can view your sitemap by adding the /sitemap.xml extension to your domain.
How to Configure XML Sitemaps Plugin
Now that you have installed the XML Sitemaps plugin, you are ready to start configuring it. Navigate to Settings >> XML-Sitemap. Since it comes with a sensible set of pre-configurations, you can even leave the settings as they are. But it will work much better if you configure it. Stay with us to show you the way you can configure it optimally based on your requirements.
First of all, when the installation is finished, you may see a message at the top of the screen: ”Search engines haven’t been notified yet”.
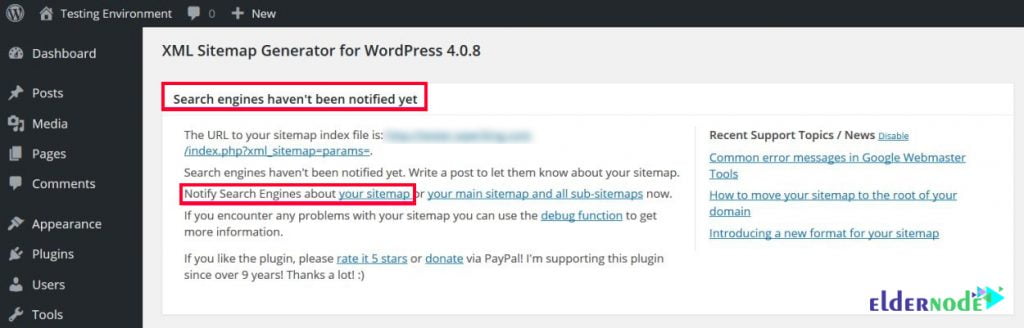
To ping your sitemap to the two major search engines such as Google and Bing, hit the notify search engines about your sitemap link to let your site indexed as quickly as possible. Then, the plugin must tell you that your ping was successful.

In the following, you will learn about the seven sections of configuring this plugin. Let’s see what the XML Sitemaps plugin does in each section:
1- Basic Options
This section will control the basic configurations.

Beginners are recommended to leave both the Google and Bing checkbox ticked. In this way, you can decide which search engines you want to notify about your site’s updates. So, after any new publish, or edit old posts, the ping process is repeated, and the crawlers are sent to scope out the changes.
The other option adds your sitemap to the robot.txt file. It communicates with search engine crawlers and guides them around your website and tells them what to index. Since the robot.txt file is useful for search engines, you are recommended to leave the robot.txt checkbox ticked. In this way, it will get you indexed in some extra search engines.
Then, you can scroll down to see the Advanced Options. You can skip the first two settings since these are regarding memory limit and execution time are largely redundant. Further down, you’ll be asked to configure the XSLT stylesheet.
To let your sitemap look nicer, you can upload a new XSLT stylesheet. Also, to be less ”readable” you can disable XSLT altogether. But be aware that search engines will still read it just fine.
The most important in this section is ”override the base URL of the sitemap”.
Now, by default, your sitemap will appear at the /sitemap.xml extension. For example domain.com/sitemap.xml.
You split your website across sub-directories.
1- Root domain: domain.com
2- Sub-directory: domain.com/blog/
If you prefer to combine all sitemaps in the root domain sitemap, you need to enter the sub-directory URL in the blank field.
Next, go to your root domain’s .htaccess file and paste the following code:
<IfModule mod_rewrite.c>RewriteEngine OnRewriteRule ^sitemap(-+([a-zA-Z0-9_-]+))?\.xml(\.gz)?$ /yourblogdir/sitemap$1.xml$2 [L]</IfModule>Note: Remember to replace ”your-blogdir” with your own sub-directory name.
The final field configures an HTML version of your sitemap for less sophisticated bots that can not understand XML. This will not apply to any of the big search engines, but, if you want to be indexed everywhere, leave the box ticked.
2- Additional Pages
In this section, you can specify additional external pages to add to your sitemap and it is applicable to those using sub-directories and sub-domains.
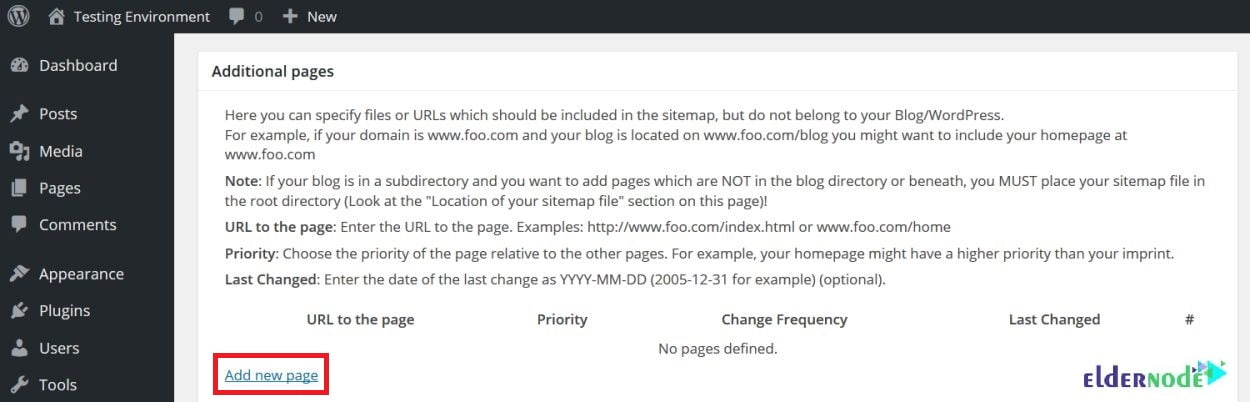
Click Add new page and follow the simple instructions. Then, specify the URL, priority level, change frequency, and the date the URL was last changed.
3- Post Priority
Priority levels are a vital part of your sitemap since they communicate your most important content to the search engines. Every individual web page gets its own priority level, scored between 0 and 1 in increments of 0.1.
If you are now thinking that you can give all your URLs the maximum priority of 1.0., it is joyful just as a guess but not more!
Now, why? Since a URL’s priority level is judged relative to other internal URLs, you should not give your homepage and blog post the same priority. Because it is clear that all URLs are not equally valuable.

Post Priority section looks at how each post’s priority is scored. As you see in the above image, there are three options:
A) Do not use automatic priority calculation:
It treats all posts equally, with the actual priority value assigned later.
B) Comment count:
If you choose this option, the priority will be calculated based on the absolute number of comments a post receives.
C) Comment average:
This option calculates the priority based on the number of comments relative to other posts.
Note: When you use one of the comment-based calculations, your popular posts will automatically receive a higher priority level.
4- Sitemap Content
In this section, you will be able to choose which items, custom post types, and taxonomies you want to include in your sitemap.
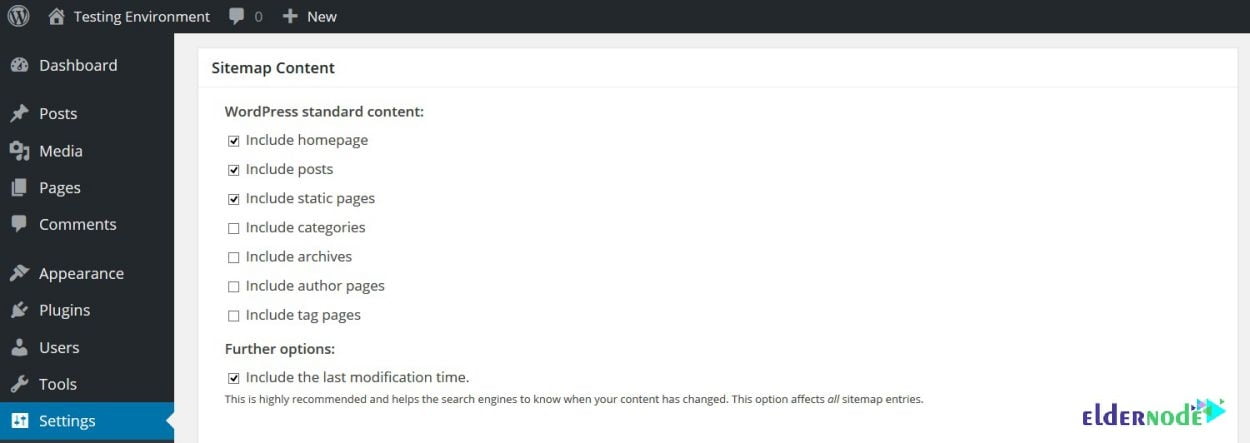
Your personal preference will dictate whether or not to include your archive or tag pages but it is also ideal to include all of your WordPress posts, pages, and custom post types.
If you do not want these pages appearing in the SERPs and the value of these pages is questionable at best make sure they are deselected.
You will see the Further options at the bottom of the section. You are recommended to leave this ticked since it includes the last modified times. Because if you do not checkmark it, the search engines will only crawl brand new content, not recently edited content.
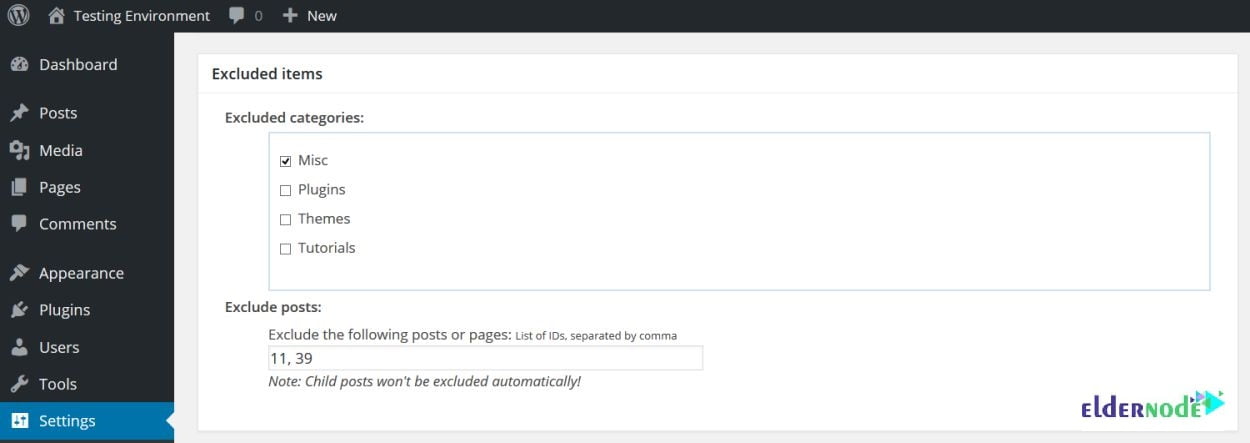
5- Excluded Items
You can choose your blog posts to include in your sitemap. So, in this section, you can exclude entire categories from the sitemap, plus individual posts and pages by entering their ID numbers.

6- Change Frequencies
You read about Frequencies changing earlier in this article They are guidelines given to the search engines and where you can define values for them.
Change frequencies let search engines know how often content is likely to change. This information tells the search engines when they need to send their crawler bots to look for updates. You are recommended to set the homepage change frequency to reflect this if you publish blog content regularly (daily). But if you rarely change your website, you can choose the yearly option. The options are always, hourly, daily, weekly, monthly, yearly, and never.
Note: This may not work as a clock but the change frequencies communicate clearly how often a type of content is updated relative to the rest.
7- Priorities
Earlier, you learned about Post Priority levels. This section lets you rank how important your other content is. Also, you need to specify blog posts’ maximum and minimum values.
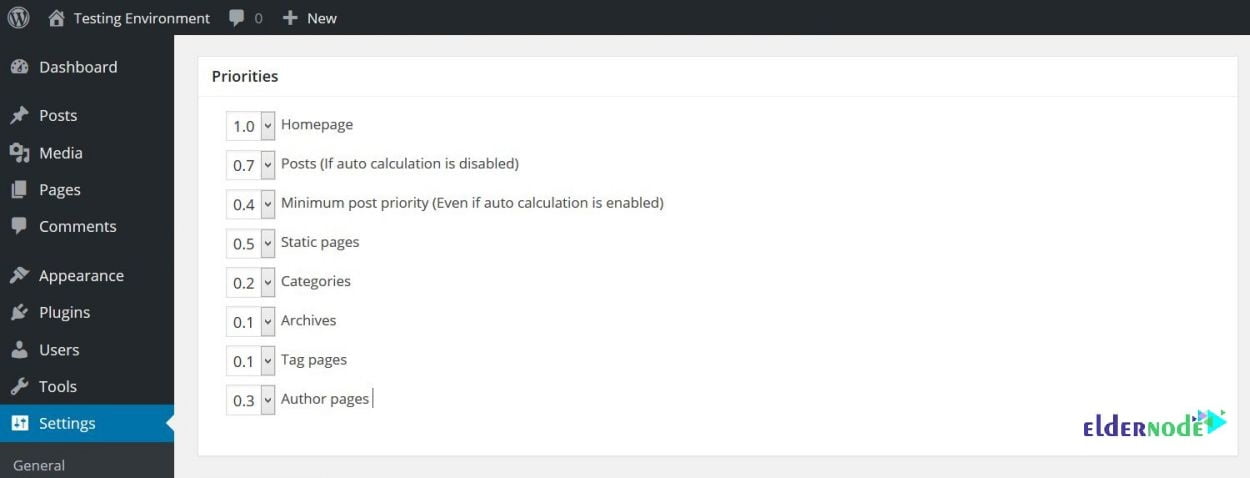
Since your homepage is probably your most important page, you are recommended to give it a maximum score of 1.0. Then, static pages and popular blog posts are likely to be your next most important pages, so remember to score them highly, too.
However, you must consider that the unimportant content should not score highly. It dilutes the priority levels of your truly important stuff.
Conclusion
In this article, you learned How To Configure XML Sitemaps Plugin. It is so important is to have an XML sitemap to help your site’s SEO. Your sitemap will list all of your URLs, as well as priority level and change frequency. If you add the right URLs, Google will easily access your most important pages and posts. To index your desired posts and pages faster, you can change their priority. Also, you can add your XML sitemap to Google Search Console to help Google find your sitemap fast. It allows you to check for sitemap errors.