An IP pool is a sequential range of IP addresses within a certain network that is used to create VMs. It is possible to have multiple pool configurations. Creating an IP pool helps you to avoid your VM connectivity issues. In this article, you will learn How To Create IP Pool And Add IP On Virtualizor. An IP Pool is a collection of IPs that can be used to create VPS. To order your considered VPS Server, visit Eldernode and ask our Technical Team to guide you on your purpose.
Table of Contents
How To Create IP Address Pool
First of all, let’s see how to create an additional network that can be used to give a VM additional Internal IP Addresses. However, you can create an IP Pool in Virtualizor as shown below:
Note: In the Internal IP Bridge field, you need to specify the bridge name you created.
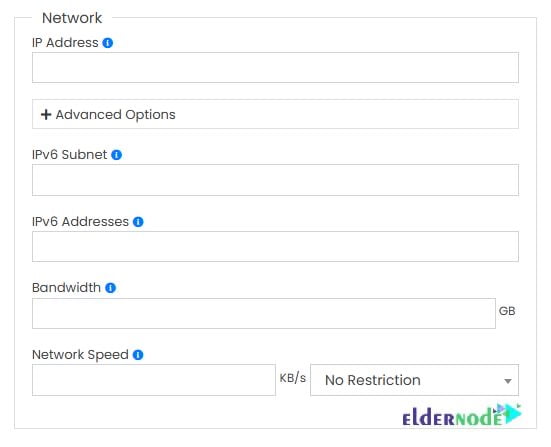
How to Assign Internet IPs on Virtualizor
Once you created the IP Pool, you are ready to assign the Internal IP Addresses. You can specify the same in your WHMCS billing module or while creating/editing a VM in Virtualizor:
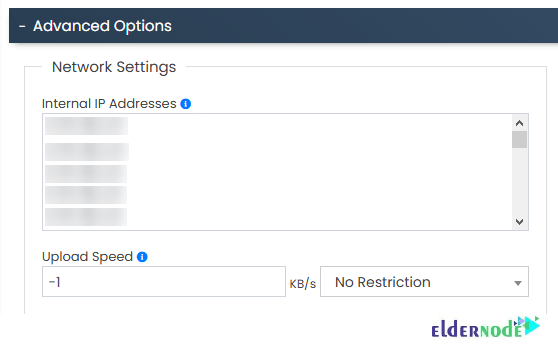
Virtualizor will assign the network IPs to the VM when the VPS is started. The VM will have two network interfaces. One for the public IP addresses and the other for the internal IP network.
How to add IPv4 on Virtualizer
Now that you have learned how to create an IP pool, you are ready to add IPs to an existing IP Pool. Previously, you have learned How to Install Virtualizor. Now, to add an IP Pool on it, follow the path below:
Virtualizor Admin >> IP Pool >> Create IP Pool
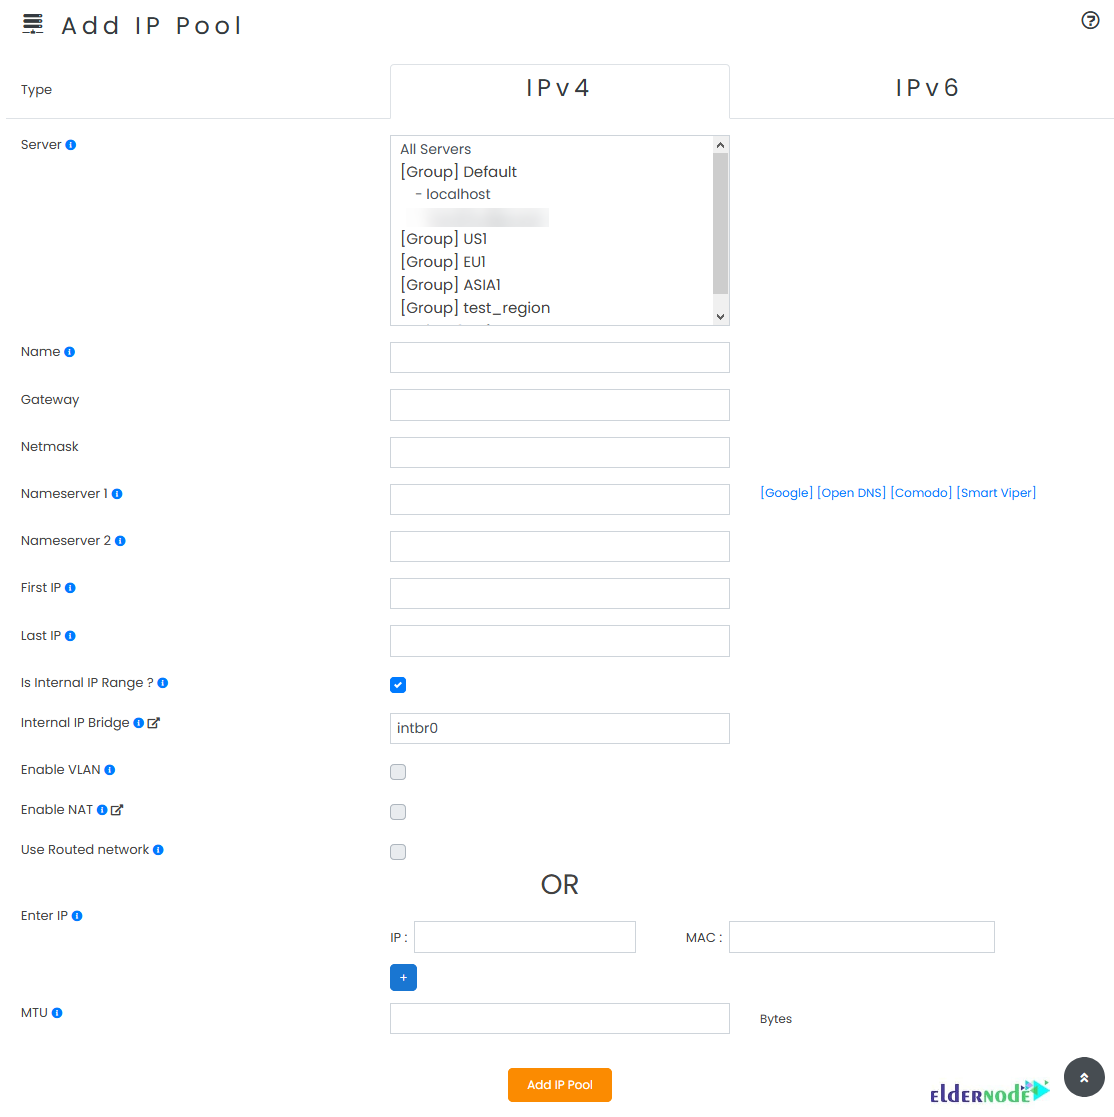
You will see the Add IP Pool wizard as shown below. To add IP pool to your node, click on Add IP pool button:

Note: You can define the Netmask, Gateways for the IPs, Name Servers, etc
What are required Inputs to add IP pool
In this section, you will get familiar with each required field you see in the above screenshot.
Type:
The type of IPs the pool will have. By default, the page will load with an IPv4 selected. If you are adding an IPv6 Pool, please choose IPv6.
Server:
In case you have slave servers, you will need to choose the Server on which this IP can be used. To change the server, please change the active server from the top menu.
Name:
A simple name for the pool so that you can identify it.
Nameserver 1:
It is the first name server that will be set within the VM that is assigned an IP from this pool.
Nameserver 2:
And this is the second name server that will be set within the VM that is assigned an IP from this pool.
First IP and Last IP:
If you are adding a range of new IPs, you can do so by specifying the range’s first and last IP. Also, there are some other fields that could be said to be Advanced Settings. Let’s see what do they do.
Enable NAT:
If this IP Pool is to be used as a NAT Pool, you will need to check this box.
Note: You cannot add IPs to an IP Pool which has NAT enabled.
Use Routed Network:
If this is enabled, VMs using the IPs from this pool will have a route file created (/etc/sysconfig/network-scripts/route-DEVICE). Some data centers need this.
Enter IP:
You will need to enter the IP(s) here. You can add multiple IPs by clicking the +button. If you are adding a range, then leave this blank and give the First IP and Last IP.
How to add IPv6 on Virtualizer
Since the Virtualizor makes it possible to make and assign IPv6 Subnets to VMs, you can break a /64 IPv6 subnet into multiple /112 subnets and assign them to the VMs. Also, you need to have an IPv6 IP Pool to be able to create IPv6 Subnets.
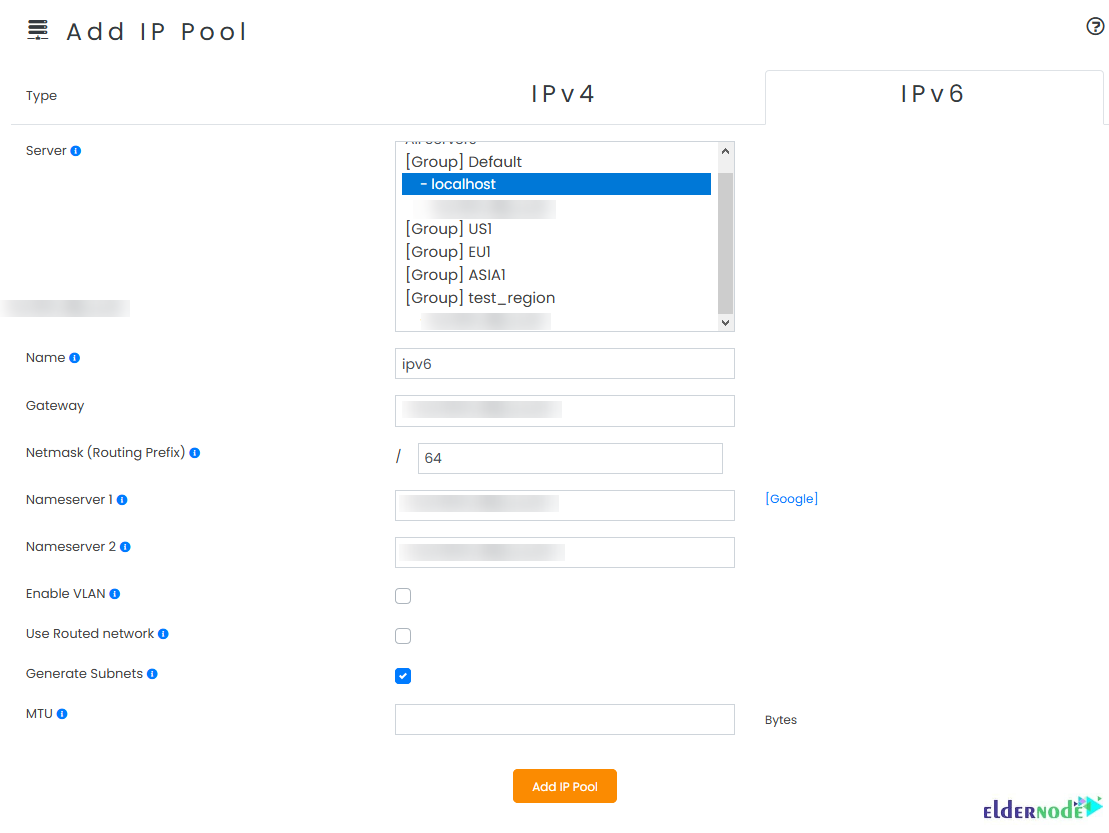
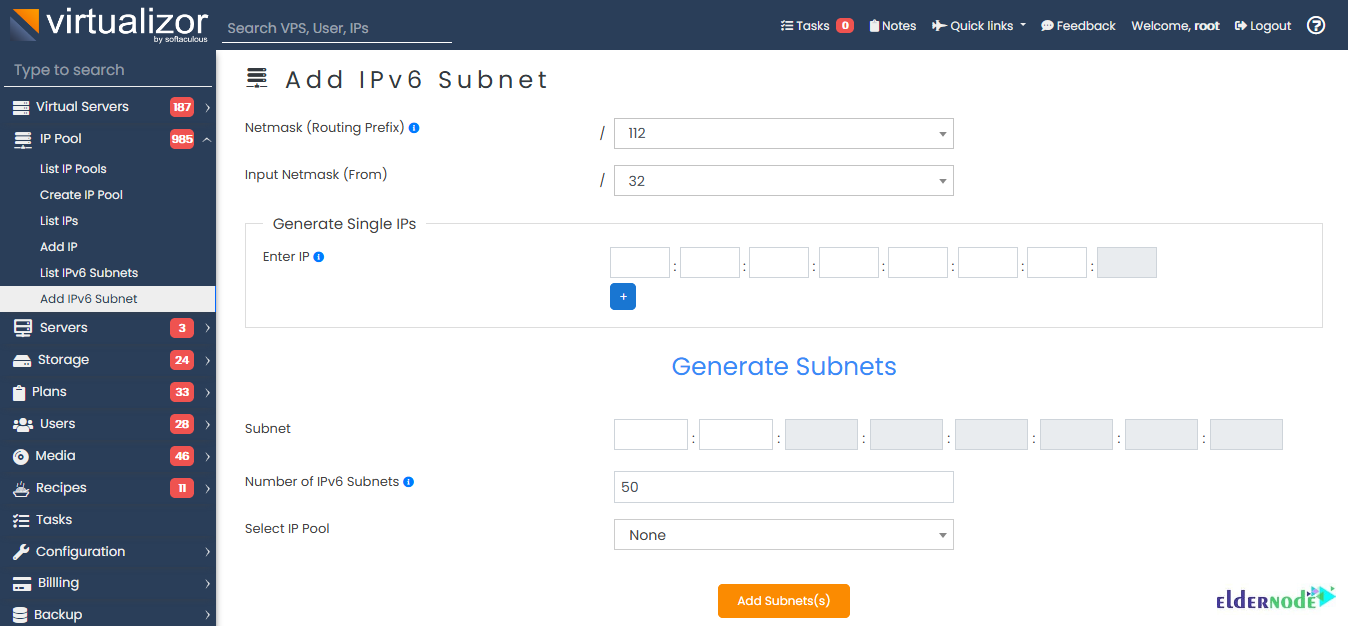
Once you have an IPv6 IP Pool, you are ready to generate the subnets. Follow the below path to add IPv6 subnets.
Go to Virtualizor Admin Panel >> IP Pool >> Add IPv6 Subnets.
Then, you can fill in the details.
How to Assign IPv6 Subnets to VM
Now that you have created the IPv6 Subnets, you can assign them to the VMs while editing or creating a new VM.
Conclusion
In this article, you learned How To Create IP Pool And Add IP On Virtualizor. You can use the list IP Pool API to list the present IP Pools on your server. In this way, according to the ID, you can see all the IP pool details in the API response. If your network setup is correct you can also use the IP Pool across multiple nodes. While creating the IP Pool, just choose ”All Servers” or the ”Node Group” accordingly.