If you do not want to miss any opportunity to make a connection, JivoChat is a business messenger that is optimized for WordPress. Undoubtedly, you wish to increase your conversion and sales. So, start talking to your customers. Using JivoChat allows you to serve efficient customer support to your clients. Live chat, phone, email, and social media keep your customers close to you everywhere you are. This article is Introducing And Install JivoChat Plugin On WordPress. Various monthly and yearly Hosting plans are available on Eldernode. Order your own WordPress VPS and stay with us.
Table of Contents
Introducing JivoChat Plugin
JivoChat is an all-in-one business messenger that saves your money, time, and effort in bringing customers to your website. Since most visitors may leave your website without buying or leaving messages and emails, you need a messenger to convert them to paying customers. Preferably, free software to customize and configure. You can use JivoChat as a single app to connect all of your communication channels. It lets you contact your visitors in real-time. JivoChat integrates with popular services such as Weebly, Zapier, Pipedrive, Wix, and more. In the following, you will read about its main features and the way you can install and use JivoChat on WordPress. then, you can have your chat widget for your WordPress website.
JivoChat Features
This plugin helps you to provide better customer service. Let’s review its easy-to-use features:
1- CMR integration, API & Webhooks
2- File transfer
3- Service quality rating
4- Offline lead generator and Offline messages
5- E-mail Chat Transcripts
6- Blacklist
7- Callbacks
8- Multi-agent Chats
9- Unlimited Archive
10- Team Chats
11- Reminders
12- Quick Phrases & Canned Responses
13- Detailed Visitor Info
14- Translator
15- GeoIP Regions
16- 25 Supported languages
How to Install JivoChat Plugin on WordPress
Donate a comfort and confidence experience to your customers with JivoChat and create an efficient and economical way to reach them on your website. Let’s go through the steps of this guide to see how is the Installation of JivoChat on WordPress.
Step 1:
In the first step, you must log in to the WordPress Dashboard by entering the username and password.
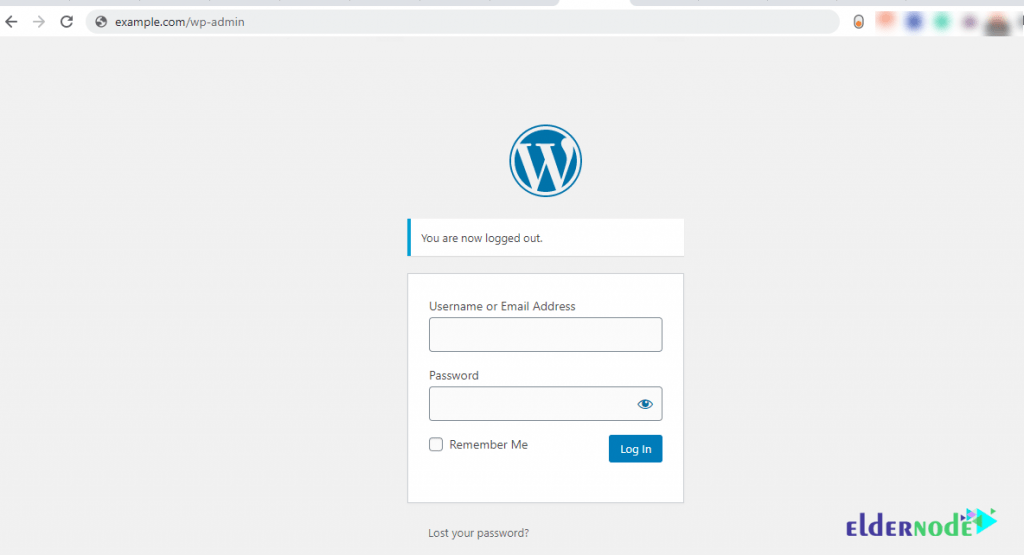
Now, you need to Install and Activate this plugin on WordPress. To do this, you can open the plugin directly on the WP plugins page and install it. But let’s choose the easy way of installing the plugin by the ”Search Plugins function”. Follow the below path to find it.
WordPress admin panel >> Plugins >> Add New.

Once you search for the JivoChat plugin, you will face two available plugins. choose the first one (JivoChat — a Live Chat for Your Site), click on ”Install Now” and then activate it.

Step 2:
After JivoChat installed successfully completed, you must create a new Jivochat account or use your own existing account. Click on ”JivoChat” on the left WordPress navigation menu. Then, add your login credentials and then click on ”Install JivoChat now”.
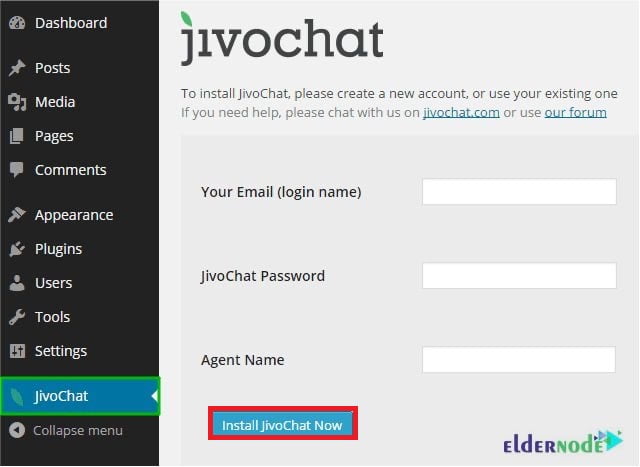
Once you see the message of ”Congratulations! You have successfully installed JivoChat on your website” you can make sure that the JivoChat plugin is successfully installed.
Conclusion
We don’t expect you to encounter serious issues while the installation. JivoChat allows you to increase engagement and capture more leads. If you install this plugin, you will reap more sales and you will be able to solve the problems of your customers faster. Finally, if you are eager, it is possible to create your very own custom widget, with your own proprietary colors and looks. In this article, the JivoChat was introduced to you and you learned how to install JivpChat on WordPress.

