
At the beginning of launching the website, you can use hosting and even shared servers, but after a while, with the popularity of the site and attracting high visitors, shared servers will not meet the needs of your site and you should think about using a dedicated server. Dedicated Server is a computer embedded for a specific task. In this article, we are going to teach you about Tutorial making Dedicated Server to Multiplayer Game on Unity. You can checkout the packages offered on the Eldernode website if you wish to purchase a dedicated server.
Table of Contents
Making Dedicated Server to Multiplayer Game on Unity
What is Dedicated Server?
Dedicated Server is a type of web hosting service that is provided exclusively to a customer. It is on 24 hours a day in the data center and is connecting to the World Wide Web. Also, it is a piece of computer hardware that is used exclusively to host websites, data, and applications. When a user uses a dedicated server, all resources such as memory, RAM, and CPU are completely on their own and they do not share them with other users. As servers should be available for a very long time and hardware stability is important, special technology is using to extend the life of server components.
Dedicated Server Usage Cases
1–> Used for an email server, database server, process server and etc.
2–> Used in various technical disciplines of engineering, medicine and etc.
3–> Used to store information
4–> Hosting websites
5–> Control, management, and evaluation of computer networks
What is Unity?
Unity is a cross-platform 2D/3D game engine and a powerful IDE for developers that is used primarily to develop video games and emulators for computers, consoles, mobile devices, and more. It can provide many of the most important internal features that make the game work. This game engine has a powerful visual interface for game building, platform development, and an active community.
Apple Developers Conference first introduced Unity in June 2005 as the unique Mac OS X game engine and was developed by the Unity Technologies team. It has since been gradually developing to support a variety of desktop, mobile, console and virtual reality operating systems.
Requirements
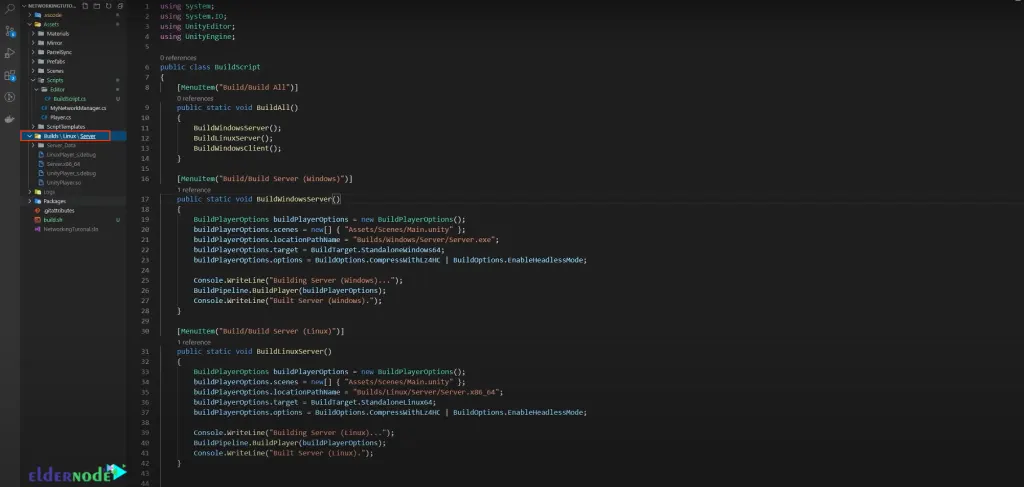
In this section, we are going to explain making Dedicated Server for Multiplayer Game on Unity. A simple build script that you should setup and it has four different methods is:
BuildAll() { BuildWindowsServer(); BuildLinuxServer(); BuildWindowsClient(); }You don’t need to go to the build settings and select a bunch of options each time to build your project, you can use the scripted method that will do everything for you.
The following script only executes the build-all method in that build script.
echo "Starting build..." "c:\Program Files\Unity\Hub\Editor\2022.5.23f1\Editor\Unity.exe" -quit -batchmode -projectPath "C:\Users\Neil\Dev\shrinewars" -executeMethod BuildScript.BuildAll echo "Finished build!"The end result of all this will be three different builds, one for the Windows Server, one for the Linux Server, and one for the Windows Client. To do this, you should deploy a Linux server. You need to buy a Dedicated Server for Multiplayer on Unity. In the next section, we will teach you how to buy a Dedicated Server for Multiplayer.
How to Buy a Dedicated Server for Multiplayer Game on Unity
First, you should go to the Eldernode website and click on Dedicated Server.
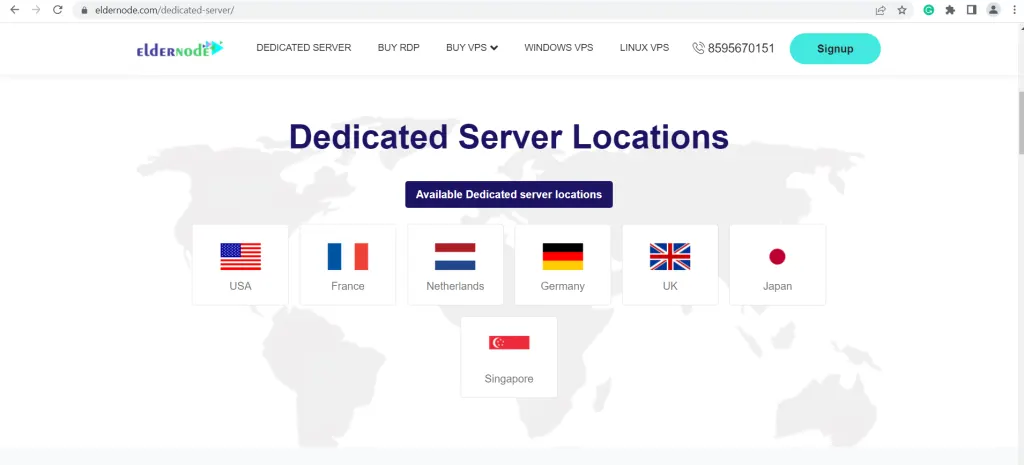
Now choose your Dedicated Server location from available Dedicated server locations. We will choose the UK.
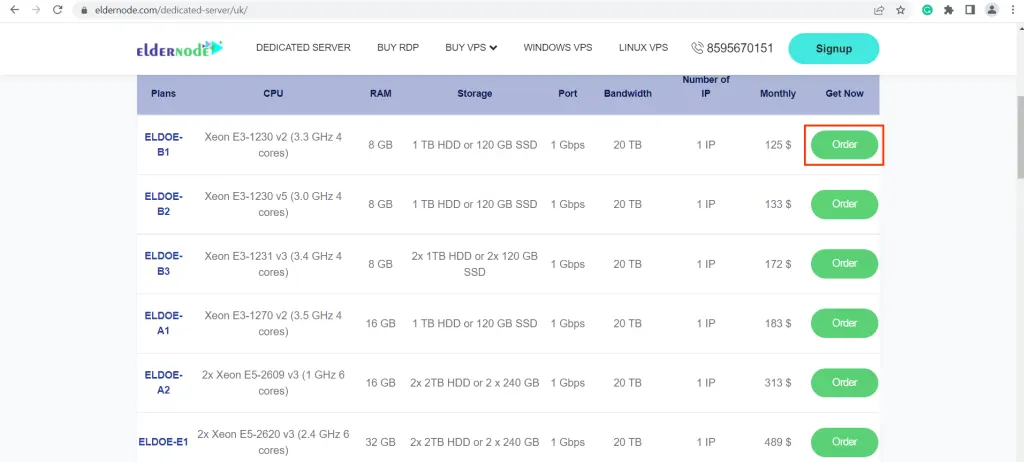
Then you need to select your Dedicated Server Plan and click on Order.
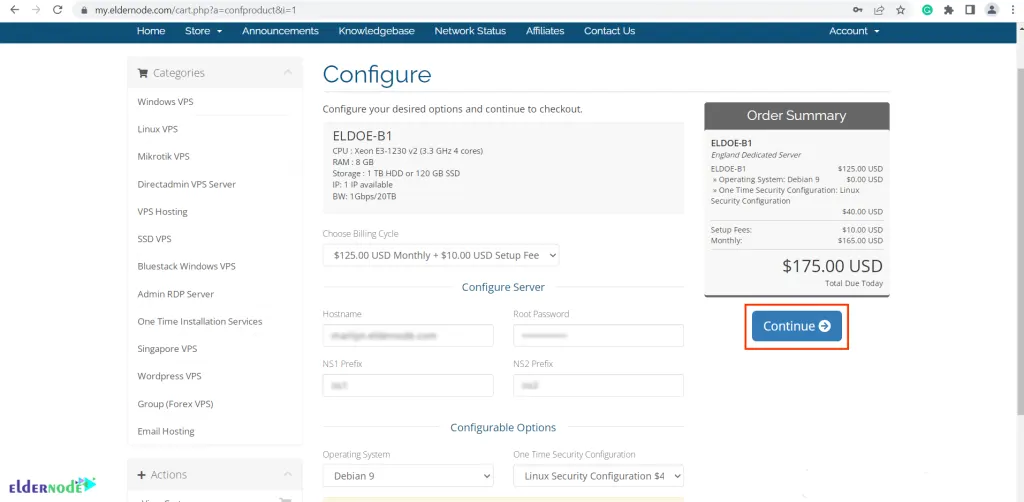
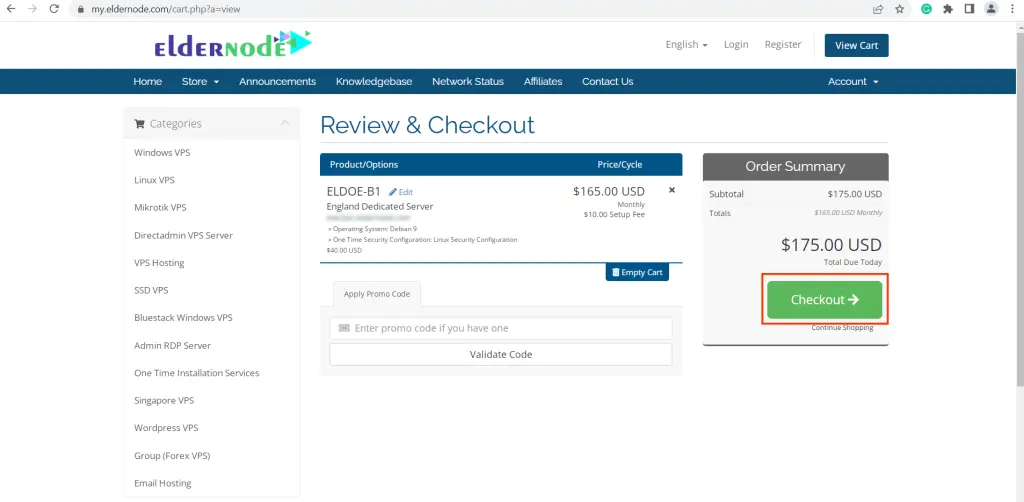
In this step, you should configure your desired options and continue to checkout. Click on Continue after filling in the relevant information.
In the last step, click on Checkout and make the payment.
Once you have paid, your desired service will deliver by the Eldernode technical experts in the shortest time.
Make Dedicated Server to Multiplayer Game on Unity
In this section, navigate to the Unity project. If you setup the editor script, you will see the Build option at the top.
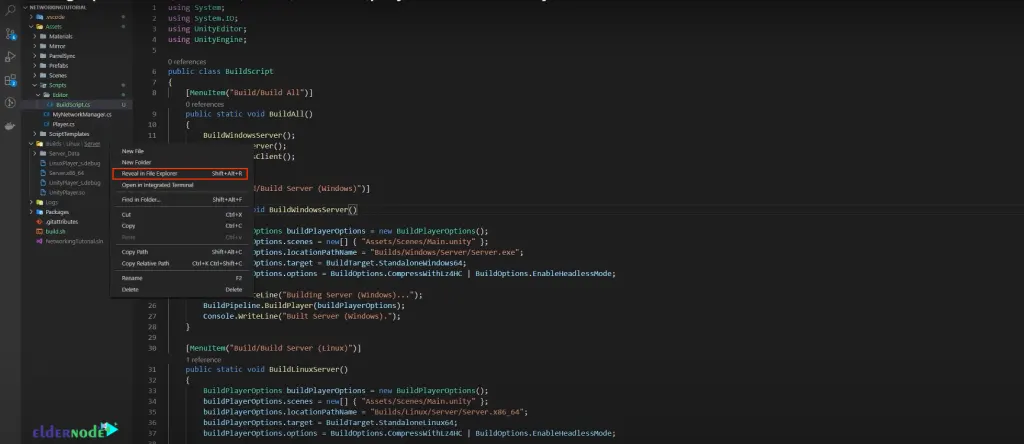
Now click on the Build Server (Linux) in the Build section. Then it will start automatically building everything. After the build is complete, if you go back to vs code you can see the builds folder.
You should open the folder in the file explorer. To do this double click on the Builds folder and select Reveal in File explorer:
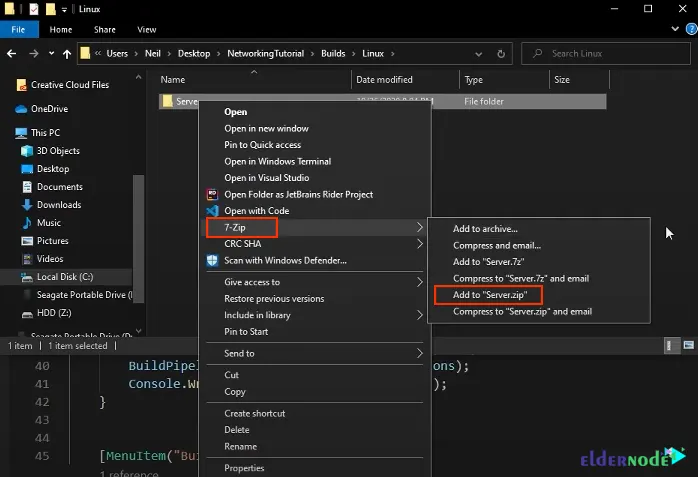
To upload, you can use 7-zip and compress it to a zip file. Select 7-Zip and then click Add to “Server.zip”:
If you click on it, Eldernode will give you a public IP and a username. You can use them to connect using SSH Client. To do this copy IP in your Terminal.
Then run the following command to connect to this server:
ssh -i ~/Downloads/sshkeypair.pem [email protected]You will be asked if you want to continue connecting, press yes.
In this section, you should upload your build zip file. To do this enter the following command:
scp -i ~Downloads/sshkeypair.pem Builds/Linux/Server.zip [email protected]:.Note: Remember to replace your IP address.
The colon and dot indicate where you want to place this zip file on your Linux server. Here it is placed right at the root.
If you want to go back to your terminal use the following command:
ls server.zipYou can unzip the uploaded file with the following command:
unzip Server.zipTo check what’s there just type the following command:
ls Server.zipTo go into the server folder just run the following command:
cd Server/Now you should see the server.x86_64 is what you will be running as the server.
In this step, go back to the Management Console and configure your instance firewall to allow traffic from only one or two ports 777. To do this go to the Networking section and click on Add role.
Note that if you use a telepathy transmission that uses TCP, you should add only one role and specifies the protocol and port to open as below. That’s it! You have setup a Firewall.
Now go back to the Linux Server terminal. Then you should run the server by entering the following command:
./Server.x86_64You should make it executable. To do this type the following:
chmod +x ./Server.x86_64Remember that try the above command again to run it.
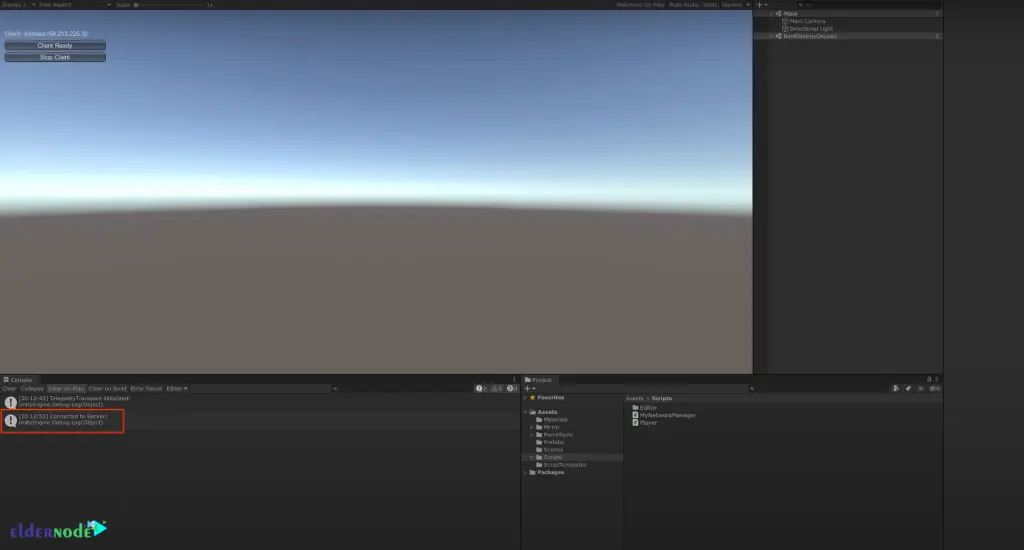
In the output, you can see Unity is initializing everything and also the telepathy transports initialized the server started and it is listening on port 7777.
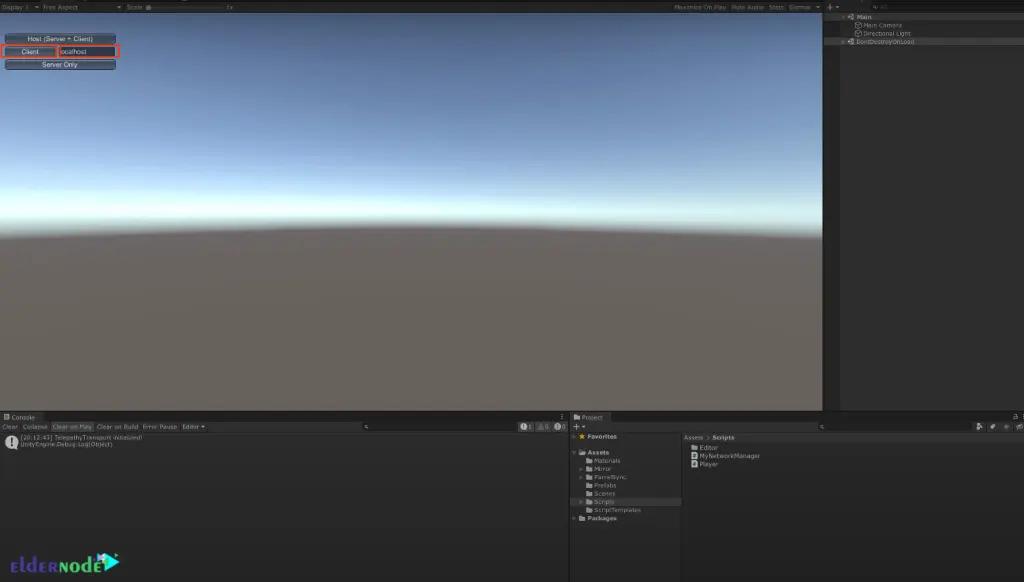
Now navigate to Unity and hit play. To join the server as a client, you have to paste the IP in the localhost section and click on Client.
You can see that you are connected to the server and move around if the client is ready. Then, click Client Ready.
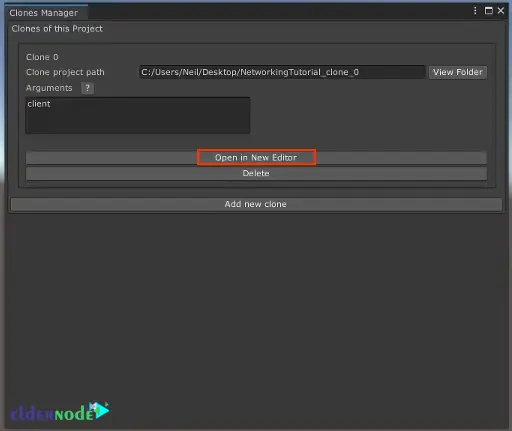
Next, we will try this with multiple clients. To do this, use ParrelSync and hit Clones Manager. After the Clones Manager window opens, click Open in New Editor.
After the new editor opens, hit play on both and paste the IP. Then click on the Client and Client Ready. Now you have two clients connected to a server on the cloud.
If you were just running only on localhost, there would be a noticeable delay.
You can do this with many tweaks such as using UDP instead of TCP and not using the default network transform.
Conclusion
Unity is the best option to start learning the game because it offers many useful features in the form of a graphical interface. At the same time, it is a professional game engine for game development. We explained all the steps needed to setup a dedicated server for your game. In this article, Making Dedicated Server to Multiplayer Game on Unity was taught. If you have any questions, you can contact us in the Comments.

We are writing this to get more detail on Unity’s Dedicated Server Build target.
We have used a dedicated server build target with linux platform for one of the multiplayer game. It’s contains the server specific logic without any assets. We have deployed the generated server build on AWS server in linux machine. We are launching the server build from an external app in the same machine with -batch mode.
But, each game instance is taking around 12% of memory of the AWS t3-large instance after launching. Here our concern is with the memory it’s takes.
1. Is it normal or we are missing something here?
2. We need to run multiple server build instances in parallel in the AWS, As many as possible. With decent Amazon EC2 instance like AWS t3-large we could go upto 8 Instances.(i.e. only 8 games can be played at a Time)
Kindly give your inputs on how to run max number of instances in parallel in the AWS.
Our suggestion for you is to use dedicated servers with at least 64 RAM for game servers. You can also visit dedicated server plans and choose the location that is closest to you. Doing this will solve your problems.