One of the most important services of a Linux web server is the DNS service, which is able to use Internet domains on the server. As you know, computers communicate with each other via IP address. But if we want to use legible letters and numbers (domains) instead of IP, the DNS mediates. PowerDNS is one of the DNS services. In this article, we are going to introduce you and teach you How to Install PowerDNS and PowerDNS Admin on Debian 11. You can check out Linux VPS services on Eldernode Website and purchase them if you want.
Table of Contents
How to Install PowerDNS and PowerDNS Admin on Debian 11
Introduction to PowerDNS and PowerDNS Admin
PowerDNS is an open-source DNS server designed and implemented on a Linux platform. This DNS server is written using the C++ programming language and is licensed under the GPL. It can be installed and used on almost all Unix, Linux, and even Windows families and also works with many backends supported by various SQL platforms. This server was founded in 1999 and became an open-source product in 2002.
PowerDNS provides both Authoritative Server and Recursor DNS products, which are offered separately. An Authoritative Server answers questions about domains it has information about and resolves questions about domains it has no information about. A DNS Recursor consults with other reputable servers to answer related questions.
PowerDNS Admin is a web-based tool that manages PowerDNS. You can use a web browser to create and manage DNS domains.
PowerDNS Features
– Provides high domain resolution performance
– Provides high statistics to help determine scalability and identify problems
– Improved security features
– Supports innumerable backends and load balancing/failover algorithms
PowerDNS Admin Features
1- Supports domain templates
2- Supports bulk domain creation
3- Supports Local DB, SAML, LDAP, Active Directory user authentication
4- Supports DynDNS 2 protocol and TOTP protocol
5- Supports Google, Github, Azure, OpenID OAuth
6- Supports IPv4 and IPv6
7- Supports DNSSec
8- Provides a domain template
9- Provides limited API for manipulating zones and records
10- Create and update reverse PTR records
How to Install PowerDNS Relational Database
Before doing anything, update your system and install the required tools by using the following commands:
sudo apt updatesudo apt upgrade sudo apt install curl vim git -yAs I mentioned before, PowerDNS supports innumerable database backends such as MySQL, PostgreSQL, Oracle and etc. You can use any of them for backend storage PowerDNS zone files. I preferred to use MariaDB. You should first install the required tools to install MariaDB by entering the following command:
sudo apt install software-properties-common gnupg2 -yNow download the MariaDB repository with the help of the following command:
curl -LsS -O https://downloads.mariadb.com/MariaDB/mariadb_repo_setup sudo bash mariadb_repo_setupInstall MariaDB after updating your package:
sudo apt update sudo apt install mariadb-server mariadb-clientYou can use the following command to start MariaDB:
sudo systemctl start mariadbTo enable MariaDB:
sudo systemctl enable mariadbNow you need to login into the shell with the root user:
sudo mysql -u rootYou can create a PowerDNS database by running the following command:
CREATE DATABASE powerdns; GRANT ALL ON powerdns.* TO 'powerdns_user'@'%' IDENTIFIED BY 'Strongpassword'; FLUSH PRIVILEGES; EXITNote that the password you set does not have special characters as it will cause “Access denied for user ‘powerdns_user’@’localhost’ (using password: YES)” error.
How to Install PowerDNS on Debian 11
First, you should stop and disable systemd-resolved service:
sudo systemctl stop systemd-resolved sudo systemctl disable systemd-resolvedNow remove the symbolic link for the file:
ls -lh /etc/resolv.conf sudo unlink /etc/resolv.confThen update the resolv.conf file with the following command:
echo "nameserver 8.8.8.8" | sudo tee /etc/resolv.confIn this step, add the repository to the system by entering the following command:
sudo vim /etc/apt/sources.list.d/pdns.list deb [arch=amd64] http://repo.powerdns.com/debian bullseye-auth-46 mainNow you should import the GPG key signing for the repository:
curl -fsSL https://repo.powerdns.com/FD380FBB-pub.asc | sudo gpg --dearmor -o /etc/apt/trusted.gpg.d/pdns.gpgThen enter the following command to set the APT preferences:
sudo vim /etc/apt/preferences.d/pdns Package: pdns-* Pin: origin repo.powerdns.com Pin-Priority: 600Update your APT package again:
sudo apt updateTo install PowerDNS and the MySQL backend from the default APT repositories, run the following command:
sudo apt install pdns-server pdns-backend-mysqlHow to Configure the PowerDNS Database on Debian 11
First, you should enter the database schemas to the PowerDNS database that was created on MariaDB, which are usually stored in /usr/share/pdns-backend-mysql/schema/ as a schema.mysql.sql file.
Import the above schema to the database that was created in the above step:
mysql -u powerdns_user -p powerdns < /usr/share/pdns-backend-mysql/schema/schema.mysql.sqlThen verify schema import with the following command:
sudo mysql -u root use powerdns; show tables;In this step, create the file to configure the PowerDNS connection details to the database:
sudo vim /etc/powerdns/pdns.d/pdns.local.gmysql.confEdit the following lines in the opened file:
# MySQL Configuration # Launch gmysql backend launch+=gmysql # gmysql parameters gmysql-host=127.0.0.1 gmysql-port=3306 gmysql-dbname=powerdns gmysql-user=powerdns_user gmysql-password=Strongpassword gmysql-dnssec=yes # gmysql-socket=Then you need to set the permissions for the file:
sudo chown pdns: /etc/powerdns/pdns.d/pdns.local.gmysql.conf sudo chmod 640 /etc/powerdns/pdns.d/pdns.local.gmysql.confNext, run the following command to verify the database connection:
sudo systemctl stop pdns.service sudo pdns_server --daemon=no --guardian=no --loglevel=9In the last step, restart and enable the PowerDNS service by running the following command:
sudo systemctl restart pdns sudo systemctl enable pdnsYou can verify that port 53 is open for DNS using the following command:
sudo ss -alnp4 | grep pdnsYou can check if PowerDNS responds to requests with the following command:
dig @127.0.0.1How to Install PowerDNS Admin on Debian 11
In the first step, you need to install the Python development package by entering the following command:
sudo apt install python3-devNow run the following command to install the required build tools:
sudo apt install libsasl2-dev libldap2-dev libssl-dev libxml2-dev libxslt1-dev libxmlsec1-dev libffi-dev pkg-config apt-transport-https virtualenv python3-venv build-essential libmariadb-dev git python3-flask -yThen you should install Node.js. To do this add the repository:
curl -sL https://deb.nodesource.com/setup_16.x | sudo -E bash -Now it’s time to install Nodejs:
sudo apt install -y nodejsThen you should install the yarn package but first add its repository and GPG key:
curl -sL https://dl.yarnpkg.com/debian/pubkey.gpg | gpg --dearmor | sudo tee /usr/share/keyrings/yarnkey.gpg >/dev/null echo "deb [signed-by=/usr/share/keyrings/yarnkey.gpg] https://dl.yarnpkg.com/debian stable main" | sudo tee /etc/apt/sources.list.d/yarn.listRun the following command to install it:
sudo apt update sudo apt install yarn -yNext, you should clone the PowerDNS admin source code with the following command:
sudo su - git clone https://github.com/ngoduykhanh/PowerDNS-Admin.git /var/www/html/pdnsIn this step, create a virtual environment as below:
cd /var/www/html/pdns/ virtualenv -p python3 flaskThen execute the following commands to activate the environment and install the libraries that were specified in the requirements.txt:
source ./flask/bin/activate pip install --upgrade pip pip install -r requirements.txtTo configure the PowerDNS Admin connectivity to your database, you should deactivate the virtual environment:
deactivateNow edit the following file:
vim /var/www/html/pdns/powerdnsadmin/default_config.pyThen edit the below line in it:
### DATABASE CONFIG SQLA_DB_USER = 'powerdns_user' SQLA_DB_PASSWORD = 'Strongpassword' SQLA_DB_HOST = '127.0.0.1' SQLA_DB_NAME = 'powerdns' SQLALCHEMY_TRACK_MODIFICATIONS = True ….
Create a database schema by running the following command:
cd /var/www/html/pdns/ source ./flask/bin/activate export FLASK_APP=powerdnsadmin/__init__.py flask db upgradeIf you receive an “ImportError: cannot import name ‘json’ from ‘itsdangerous” error, enter the following command:
pip uninstall itsdangerous pip install itsdangerous==2.0.1 flask db upgradeAfter the above problem is solved, create the asset files by running the following command:
yarn install --pure-lockfile flask assets buildFinally, deactivate the virtual environment by entering the following command:
deactivateHow to Enable PowerDNS API Access
In this step, you should enable PowerDNS API access.
Using the following command, you can open the file and enable parameters such as controlling multiple activities, reading statistics, changing the content of the area and etc.
sudo vim /etc/powerdns/pdns.confEdit the file as below:
# api Enable/disable the REST API (including HTTP listener) # api=no api=yes ########################### # api-key Static pre-shared authentication key for access to the REST API # api-key= api-key=3ce1af6c-981d-4190-a559-1e691d89b90e#You can generate one from https://codepen.io/corenominal/pen/rxOmMJIn the end, save the file and restart PowerDNS using the following command:
sudo systemctl restart pdnsNow it’s time to create a PowerDNS Virtual Host file. To do this first, install the Nginx web server:
sudo apt install nginxThen create a virtual host file as below:
vim /etc/nginx/conf.d/powerdns-admin.confand add the following content:
server { listen *:80; server_name pdnsadmin.yourdomain.com; index index.html index.htm index.php; root /var/www/html/pdns; access_log /var/log/nginx/pdnsadmin_access.log combined; error_log /var/log/nginx/pdnsadmin_error.log; client_max_body_size 10m; client_body_buffer_size 128k; proxy_redirect off; proxy_connect_timeout 90; proxy_send_timeout 90; proxy_read_timeout 90; proxy_buffers 32 4k; proxy_buffer_size 8k; proxy_set_header Host $host; proxy_set_header X-Real-IP $remote_addr; proxy_set_header X-Forwarded-For $proxy_add_x_forwarded_for; proxy_headers_hash_bucket_size 64; location ~ ^/static/ { include /etc/nginx/mime.types; root /var/www/html/pdns/powerdnsadmin; location ~* \.(jpg|jpeg|png|gif)$ { expires 365d; } location ~* ^.+.(css|js)$ { expires 7d; } } location / { proxy_pass http://unix:/run/pdnsadmin/socket; proxy_read_timeout 120; proxy_connect_timeout 120; proxy_redirect off; } }Next, rename the Nginx file:
mv /etc/nginx/sites-enabled/default{,.old}You can check the above file syntax using the following command:
nginx -tNow run the following command to set the right ownership of the file:
chown -R www-data: /var/www/html/pdnsThen remember to restart Nginx to apply the changes:
systemctl restart nginxIn the next step, you need to create a system service file for PowerDNS Admin. To do this first, create the file as follows:
vim /etc/systemd/system/pdnsadmin.serviceAnd add the following content to the created file:
[Unit] Description=PowerDNS-Admin Requires=pdnsadmin.socket After=network.target [Service] PIDFile=/run/pdnsadmin/pid User=pdns Group=pdns WorkingDirectory=/var/www/html/pdns ExecStart=/var/www/html/pdns/flask/bin/gunicorn --pid /run/pdnsadmin/pid --bind unix:/run/pdnsadmin/socket 'powerdnsadmin:create_app()' ExecReload=/bin/kill -s HUP $MAINPID ExecStop=/bin/kill -s TERM $MAINPID PrivateTmp=true [Install] WantedBy=multi-user.targetNow, create a socket file too by using the following command:
sudo vim /etc/systemd/system/pdnsadmin.socketAnd add the following content to it:
[Unit] Description=PowerDNS-Admin socket [Socket] ListenStream=/run/pdnsadmin/socket [Install] WantedBy=sockets.targetNext, you should create an environment file as follows:
mkdir /run/pdnsadmin/ echo "d /run/pdnsadmin 0755 pdns pdns -" >> /etc/tmpfiles.d/pdnsadmin.confNext, set the required permissions like below:
chown -R pdns: /run/pdnsadmin/ chown -R pdns: /var/www/html/pdns/powerdnsadmin/Remember to reload the system daemon with the following command:
systemctl reload-daemonTo start and enable the PowerDNS Admin service, enter the following command:
systemctl enable --now pdnsadmin.service pdnsadmin.socketYou can check the service status by running the following command:
systemctl status pdnsadmin.service pdnsadmin.socketHow to Access the PowerDNS Admin Web UI
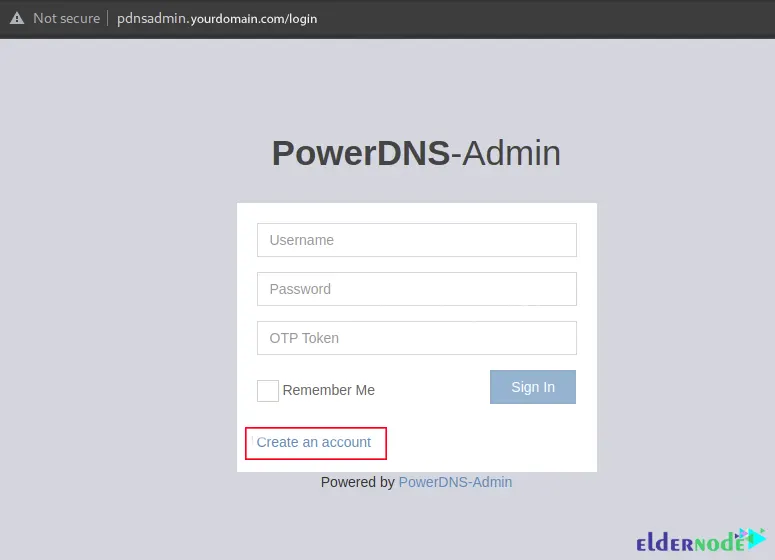
At first, navigate to the PowerDNS web UI with the help of the http://domain_name or http://IP_address URL and click on Create an account:
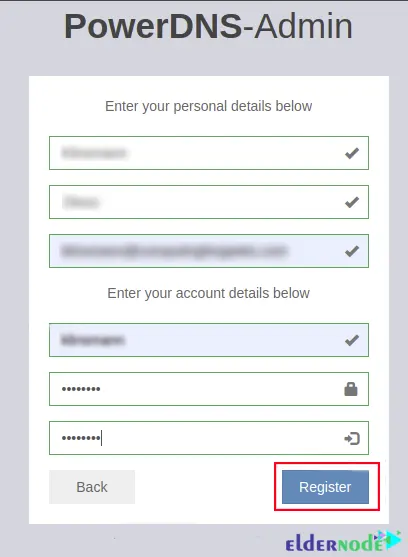
Fill in the information and click on Register to create a user admin:
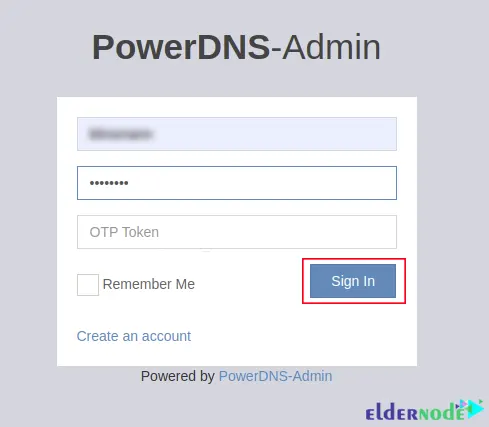
After creating an account, use it to log in to the PowerDNS Admin interface:
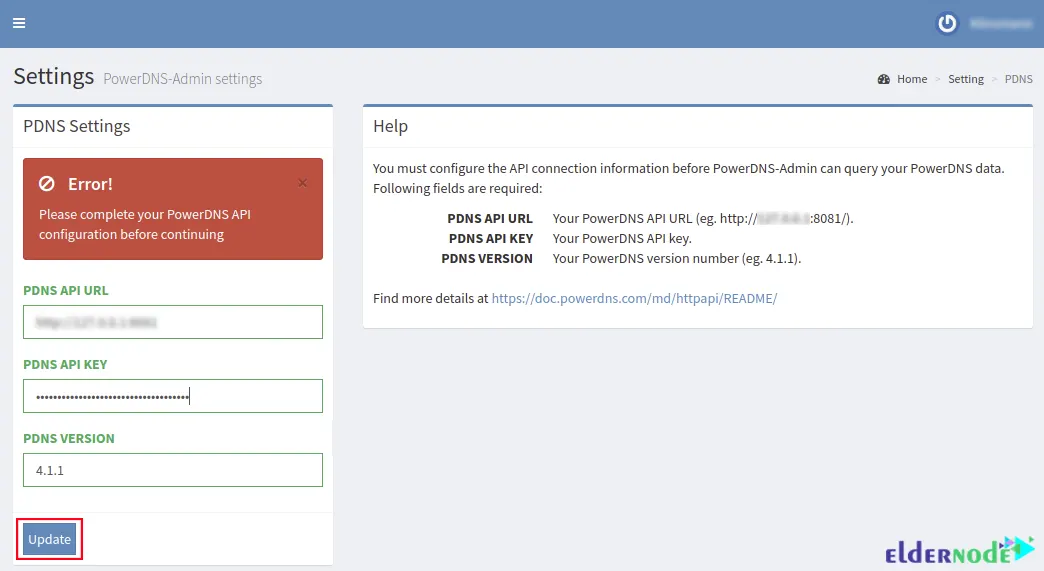
Now you should provide the API Key URL http://your-IPaddress:8081 and the API Key defined in the PowerDNS config file to manage the PowerDNS server. If you click on Update, the error will disappear:
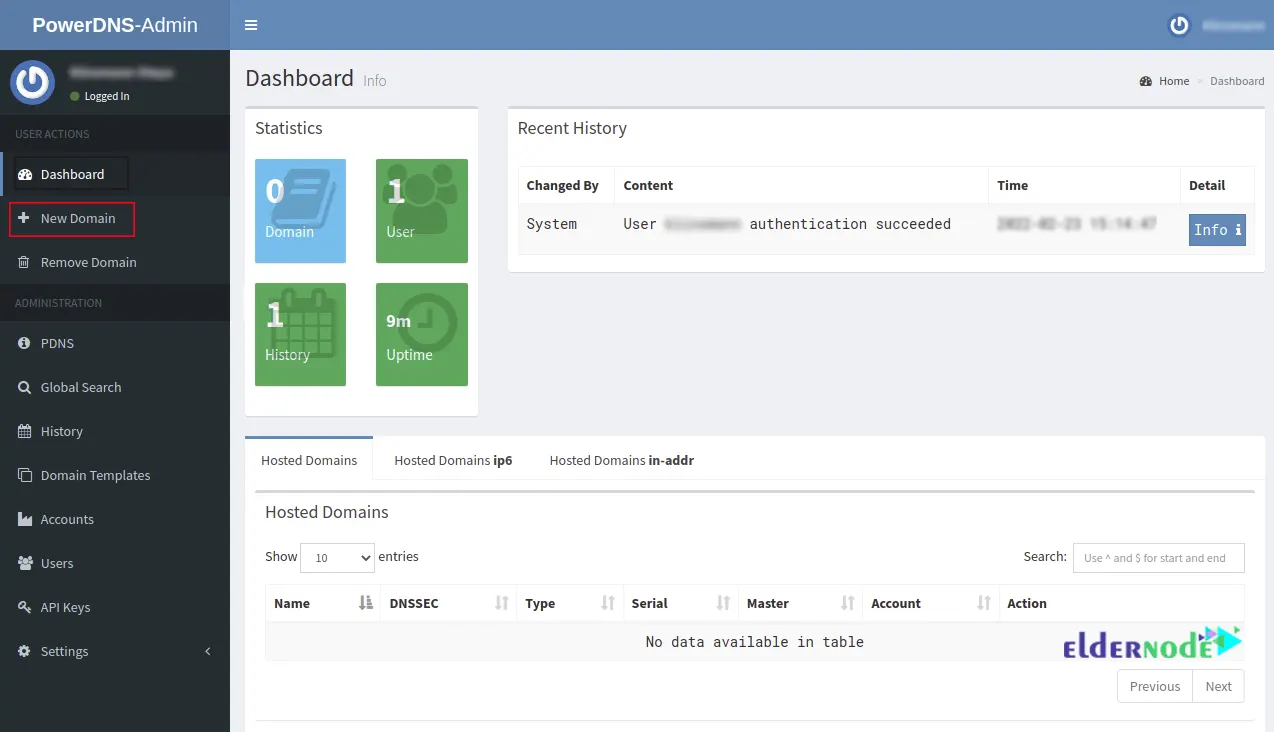
The PowerDNS Admin dashboard should be as follows. Click on + New Domain to create a new domain:
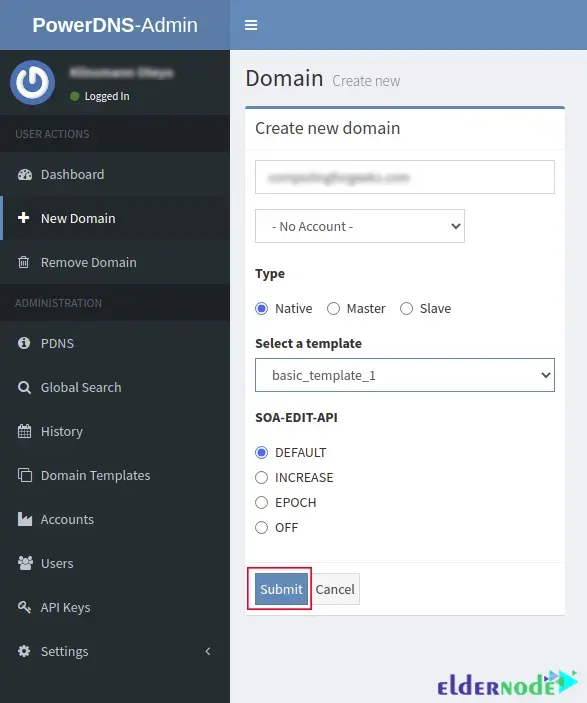
Now you should enter the domain name and select the template to use from the templates list and submit. Then your domain will add as follows:
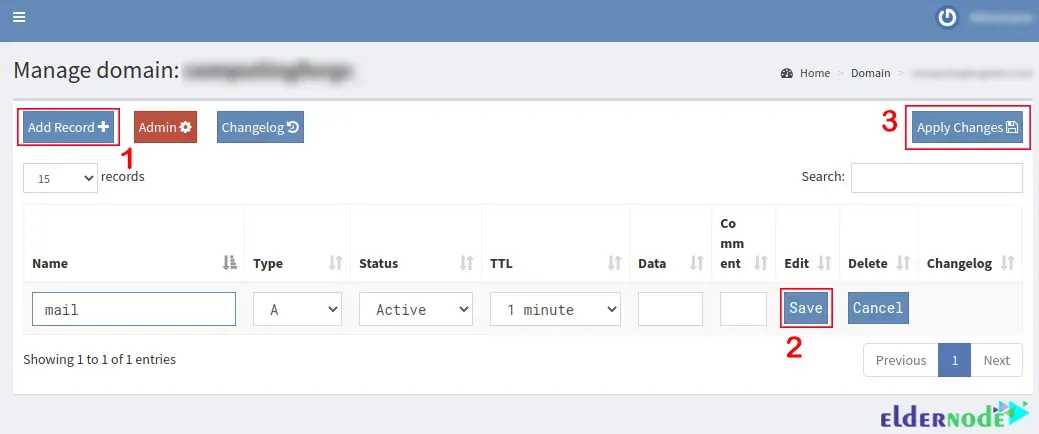
Click on the domain to add records. Then click on Add Record + and enter the record name. Press Save and Apply Changes:
That’s it!
Conclusion
PowerDNS is a DNS server and you can make many configurations using the PowerDNS Admin web UI such as removing domains, editing the domain templates and etc. In this article, we taught you to Install PowerDNS and PowerDNS Admin on Debian 11. I hope this tutorial was useful for you. If you have any questions, you can contact us in the Comments.
![Tutorial Configure Apache Cassandra on Debian 11 [Bullseye]](https://blog.eldernode.com/wp-content/uploads/2022/01/configure-apache-cassandra-on-debian-11-300x164.png)

These instructions are hard to decipher. Half of the code you have in 1 line, when they should be several different steps (several different lines).
Create a database schema by running the following command:
cd /var/www/html/pdns/ source ./flask/bin/activate export FLASK_APP=powerdnsadmin/__init__.py flask db upgrade
Thanks for your comment, this post has been corrected.
I followed this guide to the letter but when I try to create my admin-user I get an HTTP 403.
To fix the 403 error, follow these steps:
– Make sure that the Permission of the files and folders is appropriate for the content of the file and its sensitivity. Usually, not having “read” permission causes this error.
– Make sure that the htaccess file in the root of the site does not restrict access. In this file, a classified folder or items and files may be restricted by commands such as “deny from all” or “deny from yyy.yyy.yyy.yyy”.
– Check IP addresses blocked by your site.
– Choose default documents for your site. In this way, you can avoid listing folders. Especially when the direct folder address is entered.
– Check the page address (URL) and remove the last slash (/) once and try again. Also, add the path of the default pages such as index.php and index.html to the end and try again; Because folders may be prevented from being listed.