
Learn how To Install And Configure Wazuh On Centos 7 step by step. Wazuh is an open-source intrusion detection system which allows you to automatically log data analysis and monitor the integrity. Now, you can buy all Cheap CentOS VPS 7 on Eldernode to enjoy the 24/7 supports and Wazuh features on it. Whether you work with Linux, OpenBSD, FreeBSD, macOS, Solaris, and Windows it provides intrusion detection for your operating systems.
Table of Contents
Tutorial Install And Configure Wazuh On Centos 7
You can use the Wazuh as an open-source platform to threat prevention, detection, and response. Similar to the thousands of organizations around the world, you will learn how to install and use Wazuh whether you have a small or a large business. Follow this guide to be part of it. Also, the Slack channel, Google group, and GitHub repositories are its resources.
Wazuh Main Features (Configure Wazuh On Centos 7)
1- Security Analytics
2- Intrusion Analytics
3- Log Data Analysis
4- File Integrity Monitoring
5- Vulnerability Detection
6- Configuration Assessment
7- Incident Response
8- Regulatory Compliance
9- Cloud Security
10- Containers Security
Wazuh components
Wazuh System consists of several components:
1- OSSEC HIDS – Host Based Intrusion Detection System
2- OpenSCAP – Open Vulnerability Assessment Language
3- Elastic Stack – Filebeat, Elasticsearch, Kibana
4- Wazuh is loaded with a number of valued capabilities.
Install Wazuh Server On Centos 7
1) First, set the hostname and launch terminal:
hostnamectl set-hostname wazuh-server2) As always, you should update CentOS and packages:
yum update -y3) Use the command below to install NTP and check its service status:
yum install ntpsystemctl status ntpd4) You may face a situation that the service is not started, so run the following command to start it:
systemctl start ntpd5) To enable NTP on system boot type below command:
systemctl enable ntpd6) Now you need to modify, rules to allow NTP service so, type the below commands to enable service:
firewall-cmd --add-service=ntp --zone=public --permanentfirewall-cmd --reloadInstall Wazuh Manager
Use the following command to add key:
rpm --import https://packages.wazuh.com/key/GPG-KEY-WAZUHUse the command below to edit the Wazuh repository :
vim /etc/yum.repos.d/wazuh.repoNext, add the following content to the file.
[wazuh_repo] gpgcheck=1 gpgkey=https://packages.wazuh.com/key/GPG-KEY-WAZUH enabled=1 name=Wazuh repository baseurl=https://packages.wazuh.com/3.x/yum/ protect=1Now, you can save and exit the file.
Then type the following command to list the repositories:
yum repolistTo install the Wazuh manager run:
yum install wazuh-manager -yAnd it is time to install Wazuh Manager. Do not forget to check its status.
systemctl status wazuh-managerHow To Install The Wazuh API
In this part, you will add the official NodeJS repository:
curl --silent --location https://rpm.nodesource.com/setup_8.x | bash -Note: To run the Wazuh API, NodeJS>= 4.6.1 is required. Follow our article on How To Install Node.js On CentOS 7.
Or to install NodeJS:
yum install nodejs -yIf you install the Wazuh API, it will update NodeJS if it is required:
yum install wazuh-apiAnd then, check the status of wazuh-api.
systemctl status wazuh-apiYou can use the following command to change the default credentials manually:
cd /var/ossec/api/configuration/authThen, run the command below to set a password for the user:
node htpasswd -Bc -C 10 user darshanaYou can restart API anytime you type:
systemctl restart wazuh-apiAlso, you can change the port manually if it is required. The file /var/ossec/api/configuration/config.js contains the parameter:
// TCP Port used by the API. config.port = "55000";How To Install Filebeat
What is Filebeat? It is the tool on the Wazuh server that securely forwards alerts and archived events to Elasticsearch.
To install it, type:
rpm --import https://packages.elastic.co/GPG-KEY-elasticsearchSetup repository:
vim /etc/yum.repos.d/elastic.repoAdd the following contents to the server:
[elasticsearch-7.x] name=Elasticsearch repository for 7.x packages baseurl=https://artifacts.elastic.co/packages/7.x/yum gpgcheck=1 gpgkey=https://artifacts.elastic.co/GPG-KEY-elasticsearch enabled=1 autorefresh=1 type=rpm-mdAnd to install Filebeat:
yum install filebeat-7.5.1The Filebeat configuration is pre-configured to forward Wazuh alerts to Elasticsearch, but you can download it from the Wazuh repository:
curl -so /etc/filebeat/filebeat.yml https://raw.githubusercontent.com/wazuh/wazuh/v3.11.0/extensions/filebeat/7.x/filebeat.ymlUse the command below if you need to change file Permissions:
chmod go+r /etc/filebeat/filebeat.ymlNow, download the alerts template for Elasticsearch:
curl -so /etc/filebeat/wazuh-template.json https://raw.githubusercontent.com/wazuh/wazuh/v3.11.0/extensions/elasticsearch/7.x/wazuh-template.jsonchmod go+r /etc/filebeat/wazuh-template.jsonType the following command to download the Wazuh module for Filebeat:
curl -s https://packages.wazuh.com/3.x/filebeat/wazuh-filebeat-0.1.tar.gz | sudo tar -xvz -C /usr/share/filebeat/moduleNow, you must add Elasticsearch server IP. Edit “filebeat.yml.”
vim /etc/filebeat/filebeat.ymlAnd modify the following line:
output.elasticsearch.hosts: ['http://ELASTIC_SERVER_IP:9200']Run the commands below to enable and start the Filebeat service:
systemctl daemon-reload systemctl enable filebeat.service systemctl start filebeat.serviceHow To Install Elastic Stack
in this step, you will configure the second Centos server with ELK. You can do this on your elastic stack server.
As you guess, the first step is to set-hostname:
hostnamectl set-hostname elkAnd use the following command to update the system:
yum update -yHow To Install ELK
All you need to do in this part is to install the Elastic Stack with RPM packages and then add the Elastic repository and its GPG key:
rpm --import https://packages.elastic.co/GPG-KEY-elasticsearchNext, create a repository file:
vim /etc/yum.repos.d/elastic.repoAdd the following content to the file:
[elasticsearch-7.x] name=Elasticsearch repository for 7.x packages baseurl=https://artifacts.elastic.co/packages/7.x/yum gpgcheck=1 gpgkey=https://artifacts.elastic.co/GPG-KEY-elasticsearch enabled=1 autorefresh=1 type=rpm-mdHow To Install Elasticsearch
Run the following command to Elasticsearch package:
yum install elasticsearch-7.5.1.By default, Elasticsearch listens on the loopback interface (localhost). So, you need to configure Elasticsearch to listen to a non-loopback address by editing /etc/elasticsearch/elasticsearch.yml and uncommenting the network.host configuration. Adjust the IP value you want to connect to:
network.host: 0.0.0.0By the way, you can change firewall rules.
firewall-cmd --permanent --zone=public --add-rich-rule=' rule family="ipv4" source address="34.232.210.23/32" port protocol="tcp" port="9200" accept'And also to reload firewall rules:
firewall-cmd --reloadHowever, the further configuration will be necessary for the elastic search configuration file.
Edit the “elasticsearch.yml” file.
vim /etc/elasticsearch/elasticsearch.ymlNow, change or edit “node.name” and “cluster.initial_master_nodes”.
node.name: <node_name>cluster.initial_master_nodes: ["<node_name>"]Next, run the following command to enable and start the Elasticsearch service:
systemctl daemon-reloadAnd enable on system boot.
systemctl enable elasticsearch.serviceTo start elastic search service, use the following command:
systemctl start elasticsearch.serviceTo check the status of the elastic search, type:
systemctl status elasticsearch.serviceYou need to check the log file for any issues.
tail -f /var/log/elasticsearch/elasticsearch.logYou need to load the Filebeat template after running Elasticsearch. So, run the following command on the Wazuh server.
filebeat setup --index-management -E setup.template.json.enabled=falseHow To Install Kibana
To install the Kibana package, type:
yum install kibana-7.5.1And to install the Wazuh app plugin for Kibana:
sudo -u kibana /usr/share/kibana/bin/kibana-plugin install https://packages.wazuh.com/wazuhapp/wazuhapp-3.11.0_7.5.1.zipAt this point, please be aware that Kibana PluginNeed to modify Kibana configurations to access Kibana from the outside. You can edit the Kibana configuration file.
vim /etc/kibana/kibana.ymlAlso, you can change the following line.
server.host: "0.0.0.0"Then, configure the URLs of the Elasticsearch instances.
elasticsearch.hosts: ["http://localhost:9200"]Again, Run the commands below to enable and start the Kibana service:
systemctl daemon-reload systemctl enable kibana.service systemctl start kibana.serviceHow To Add Wazuh API To Kibana Configurations
First, you need to edit “wazuh.yml.”
vim /usr/share/kibana/plugins/wazuh/wazuh.ymlRemember to edit hostname, username, and password. Then, you can save and exit the file and restart the Kibana service.
systemctl restart kibana.serviceIn this way, you installed the Wazuh server and the ELK server. So, let’s add hosts using an agent.
Install Wazuh agent
In this step, you need to pass two parts:
1- Adding Ubuntu Server
2- Installing needed packages
apt-get install curl apt-transport-https lsb-release gnupg2And to install the Wazuh repository GPG key use:
curl -s https://packages.wazuh.com/key/GPG-KEY-WAZUH | apt-key add -Run the command below to add the repository and then update repositories.
echo "deb https://packages.wazuh.com/3.x/apt/ stable main" | tee /etc/apt/sources.list.d/wazuh.listapt-get updateTutorial Install The Wazuh agent (Configure Wazuh On Centos 7)
What the blow command does is to add “WAZUH_MANAGER” IP to wazuh-agent configuration automatically when installing it.
WAZUH_MANAGER="52.91.79.65" apt-get install wazuh-agentHow To Add CentOS host
By running the below command, you will add the Wazuh repository.
rpm --import http://packages.wazuh.com/key/GPG-KEY-WAZUHAnd then, edit and add to the repository:
vim /etc/yum.repos.d/wazuh.repoAdd the following contents:
[wazuh_repo] gpgcheck=1 gpgkey=https://packages.wazuh.com/key/GPG-KEY-WAZUH enabled=1 name=Wazuh repository baseurl=https://packages.wazuh.com/3.x/yum/ protect=1Use the following command to install the agent.
WAZUH_MANAGER="52.91.79.65" yum install wazuh-agentHow To Access To Wazuh Dashboard
First, browse Kibana using the IP.
http://IP or hostname:5601/The below interface should display:
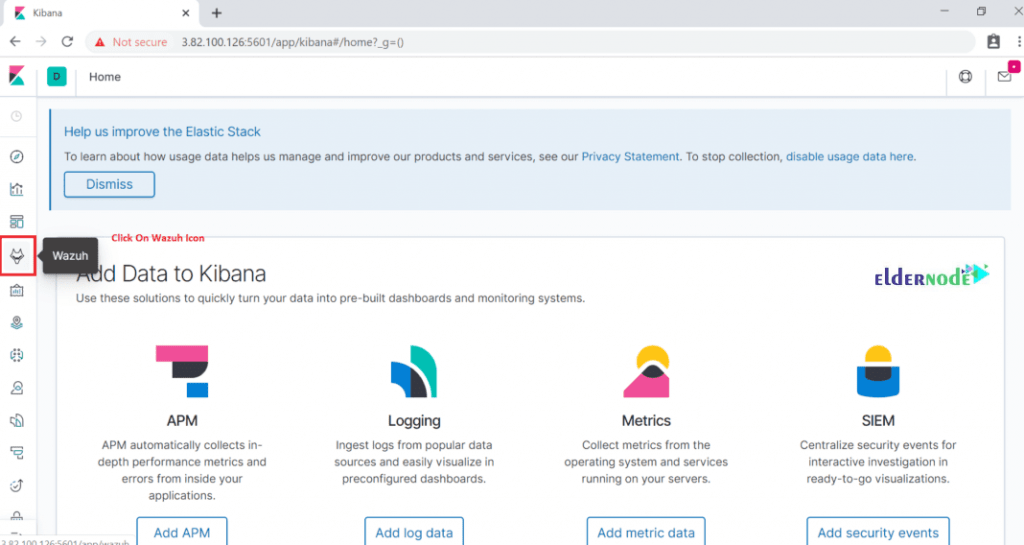
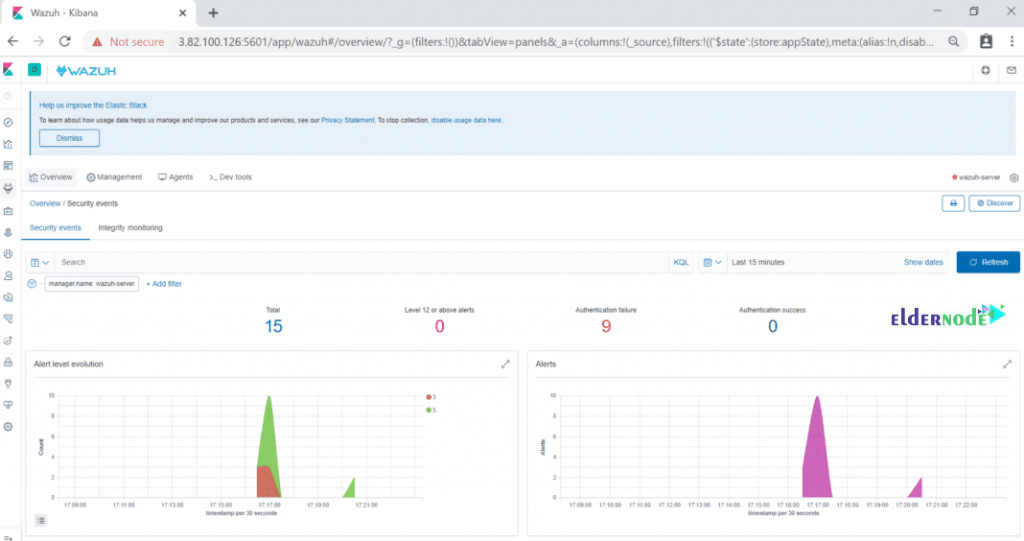
If you click on “Wazuh ” Icon, you would go to its Dashboard and you can see “Wazuh” Dashboard as follows.

Now, you should see the connected agents, security information management, etc. Click on security events to see a graphical view of events.
Uninstall The Agent :
apt-get remove wazuh-agentSince some of the package managers do not remove those files from the filesystem because of their designation, you should run the following command to provide a complete file removal:
apt-get remove --purge wazuh-agent By reaching here, you have finished learning all that was needed for installing and configuring the Wazuh server on CentOS.
Conclusion
In this article, you learned How To Install And Configure Wazuh On Centos 7. Due to your operating system and whether or not you wish to build from sources there would be several options for installing the Wazuh server. In case you are interested in reading more, find our article on How to Install CWP on CentOS 7.


Need to correct version number of elasticsearch.
yum install elasticsearch-7.5.1
Thanks for your comment, the changes of your comment have been applied.